Review and teardown of Tongou single phase 32A MCB
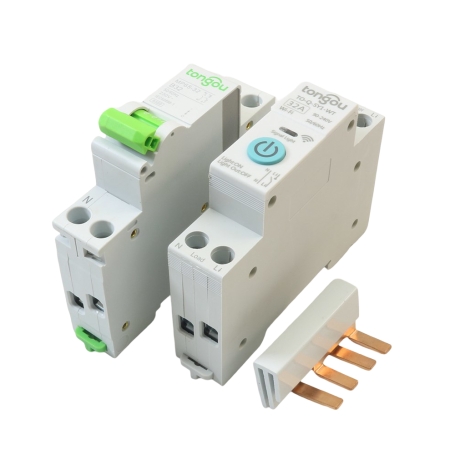
A little while ago, I came across a Tongou single-phase 32A smart miniature circuit breaker (MCB) while looking for a way to automate switching an MCB. The device ships together with a regular MCB. From the manual, I understood that you install those two in series inside the distribution box. The manual explicitly warns against using the smart unit (the one with a blue button) as the circuit breaker. In practice, the smart unit is only meant to close the circuit; the regular green MCB is the protective device that actually opens the circuit when needed.
As you’ll see below, I had to open the smart unit and discovered a relay inside. That relay cannot interrupt the current while the circuit is under load. Anyway, after inspecting the board, I found it runs on the Tuya platform. Since I had Home Assistant (HA) running on my local network, I wanted it to communicate directly with the breaker. Tuya-based smart devices normally work like this: you control the device from a phone app (SmartLife, for example), the device is registered on Tuya’s cloud servers during setup, and your phone sends on/off requests to Tuya’s servers, which then forward them to the device — in other words, the device relies on the internet. If the internet goes down, a local key is stored in the device’s firmware and in the SmartLife app, allowing you to control the device locally over your LAN. This behavior is common to most Tuya-based products.
There is a Home Assistant integration that can do this, but because of internet instability in my country and security concerns (e.g., incidents like the Snowa TV case), I didn’t want the device to be connected to the internet at all. If I could extract the local key, I could control the breaker entirely from HA on the LAN without needing internet access. The latest working method I found was a YouTube tutorial . Other methods used to work but are now broken — for example, installing SmartLife on a virtual Android device and extracting the key from the app files, which requires root. That approach didn’t work for me because the SmartLife app and the device firmware have been updated, and those older tricks no longer work.
The method shown on YouTube required a Tuya Developer account. Registration is free and fairly straightforward. The catch is that the free developer access I’d used previously expired after a month, so that route may be temporary. If you only have one device and don’t mind this limitation, you can try the developer account method; it might work for you.
After a lot of trial and error, I ended up opening the unit and flashing an open-source firmware called OpenBK7231. Long story short: many Tuya-based devices use common SoCs such as the BK7231T and BK7231N. The OpenBK project provides an open firmware replacement for those chips, so you can free the device from the vendor’s closed software. First, you must open the device:
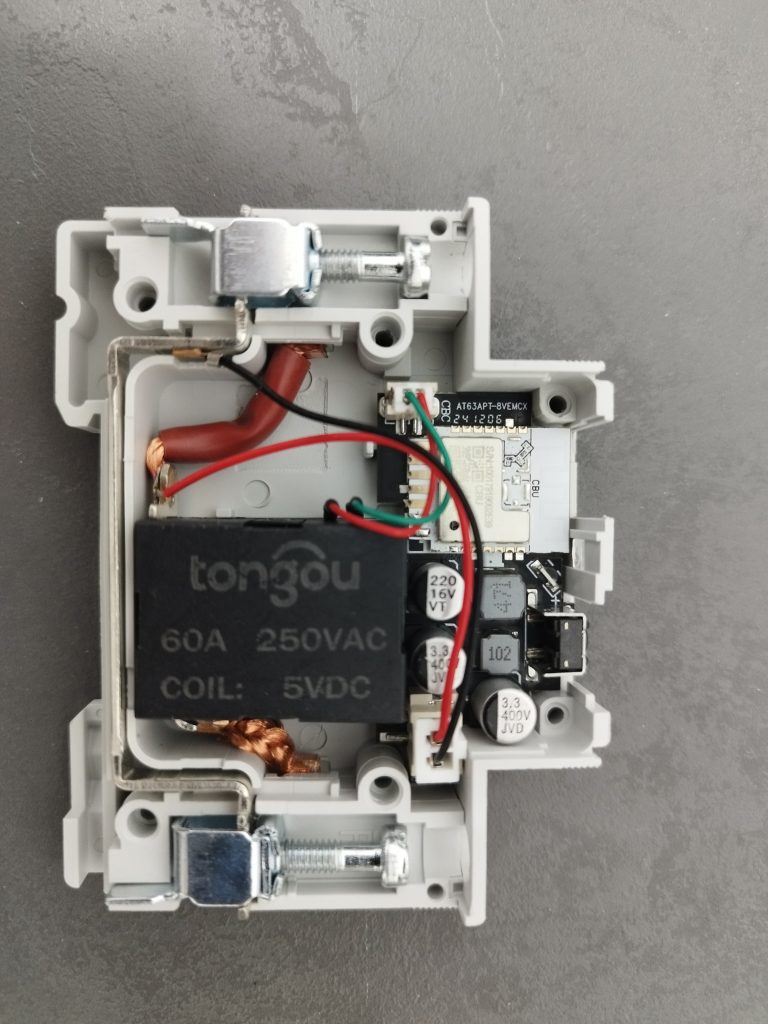
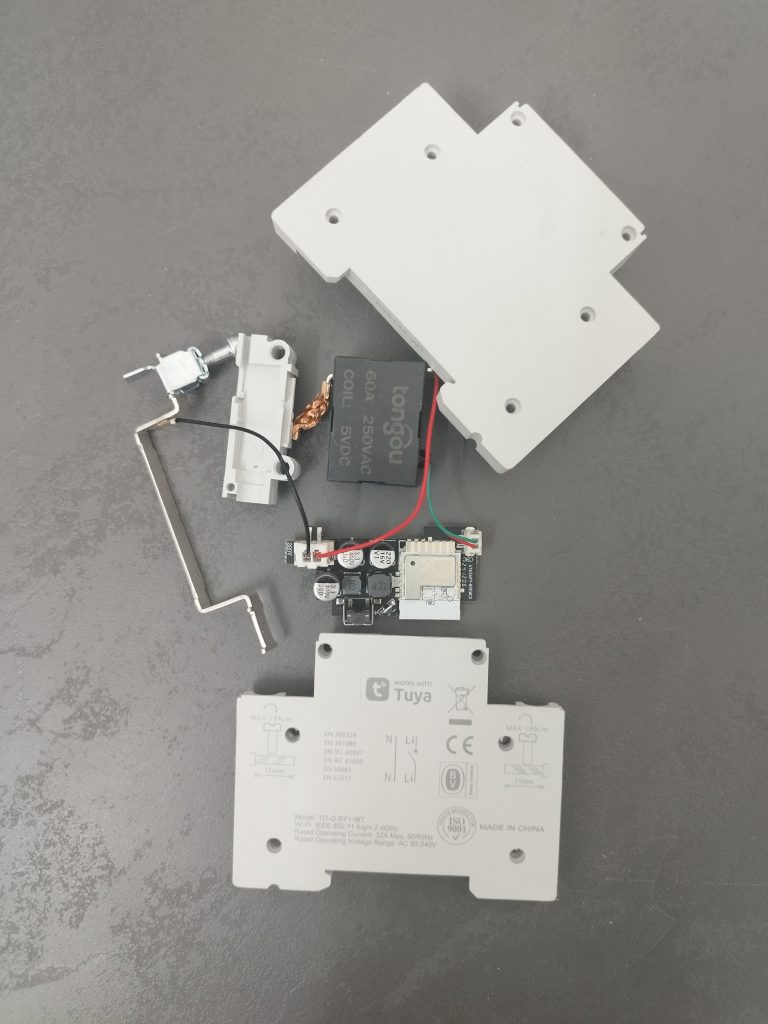
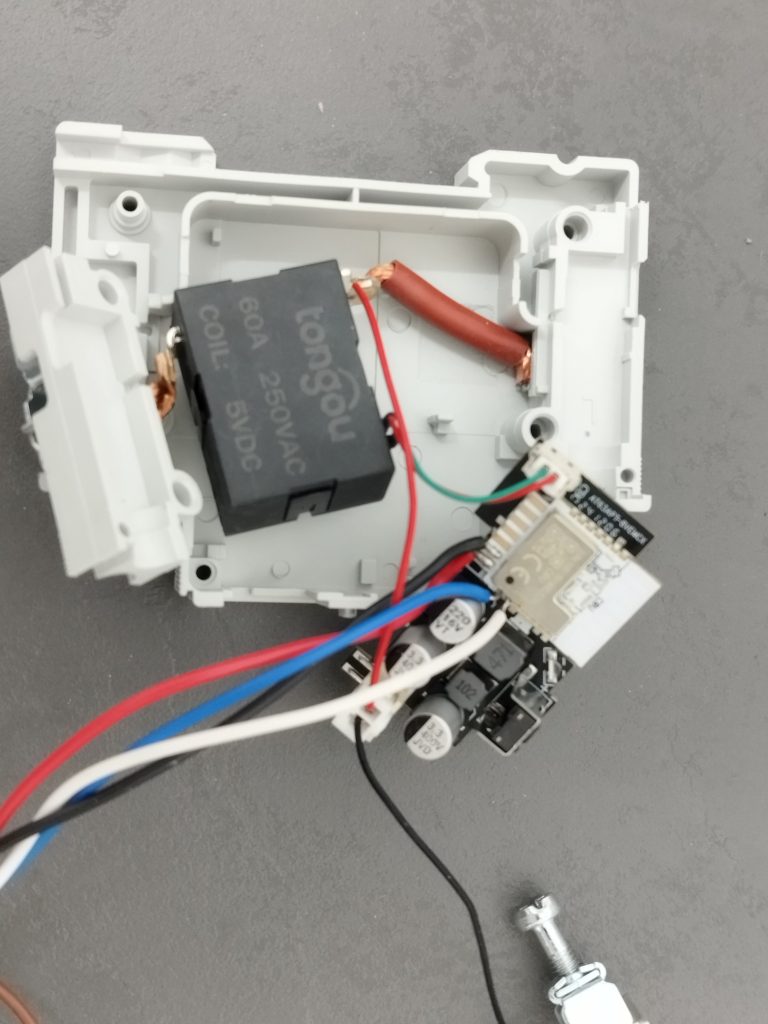
In the photo above, you can see the module’s interior: a relay next to a small PCB. There are four pins you must connect to in order to flash the firmware — two for power and two for data.
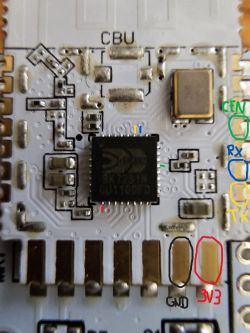
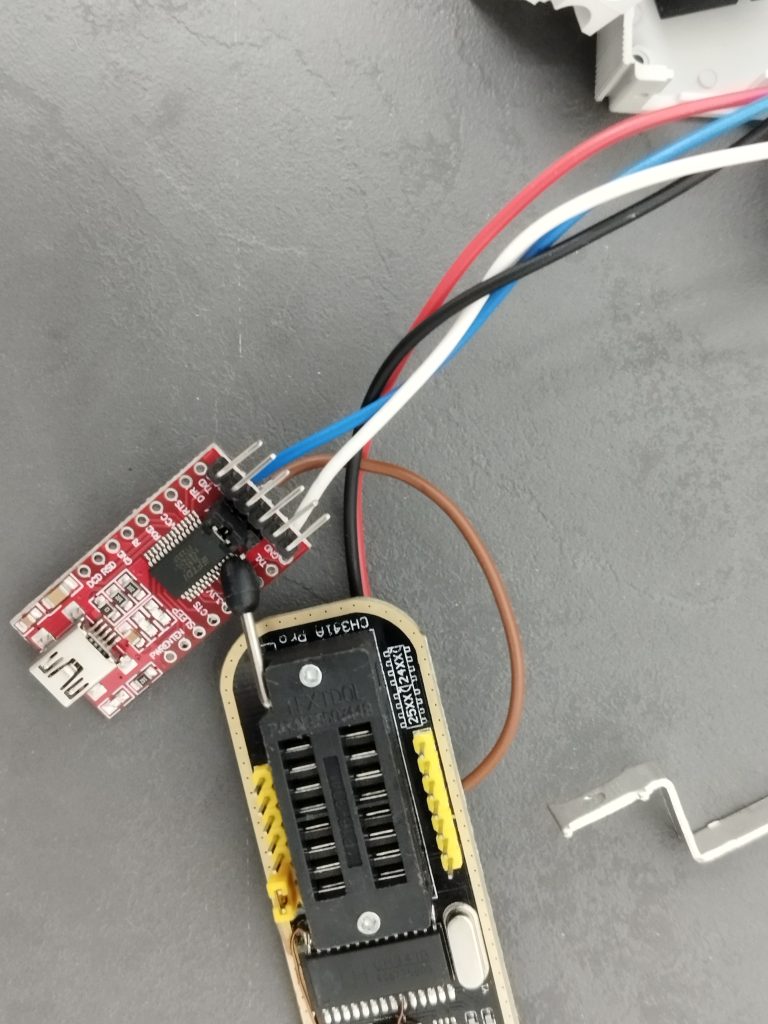
When you run the program, you need to know which IC model your board uses — mine was marked BK7231N (you usually need to remove the cover to read it). The OpenBK tool automatically downloaded the correct firmware for my chip. Before flashing, I backed up the original vendor firmware in case I needed to revert. The program also extracts a GPIO template from the original firmware, showing how the vendor’s firmware assigned board pins to functions. This template is important because it tells the OpenBK firmware which pins control the relay, which pin the physical button is wired to, and so on. Before writing the new firmware, press Change OBK Settings for flash write, then enter your Wi-Fi SSID and password so the device can connect to your network automatically after flashing; you can also set the device hostname there. Finally, flash the firmware — I did that, and it worked.
I also tried to extract the local key directly from the original firmware backup, but failed. If extracting that key were possible, I wouldn’t have needed to replace the firmware, and things would have been simpler. Note that my description above is not a step-by-step tutorial but rather an outline of what’s possible. For ordinary users, these steps are probably not worth the risk — there’s a real chance of bricking the device or making it nonfunctional.
This particular enclosure is cramped and doesn’t leave much room, but once you install OpenBK, you gain access to additional GPIOs if the hardware exposes them. After the process is finished, power-cycle the device, open a browser, and go to the device’s IP address on your LAN — and that’s it.