MS-J10 IP Camera, Review and assembling

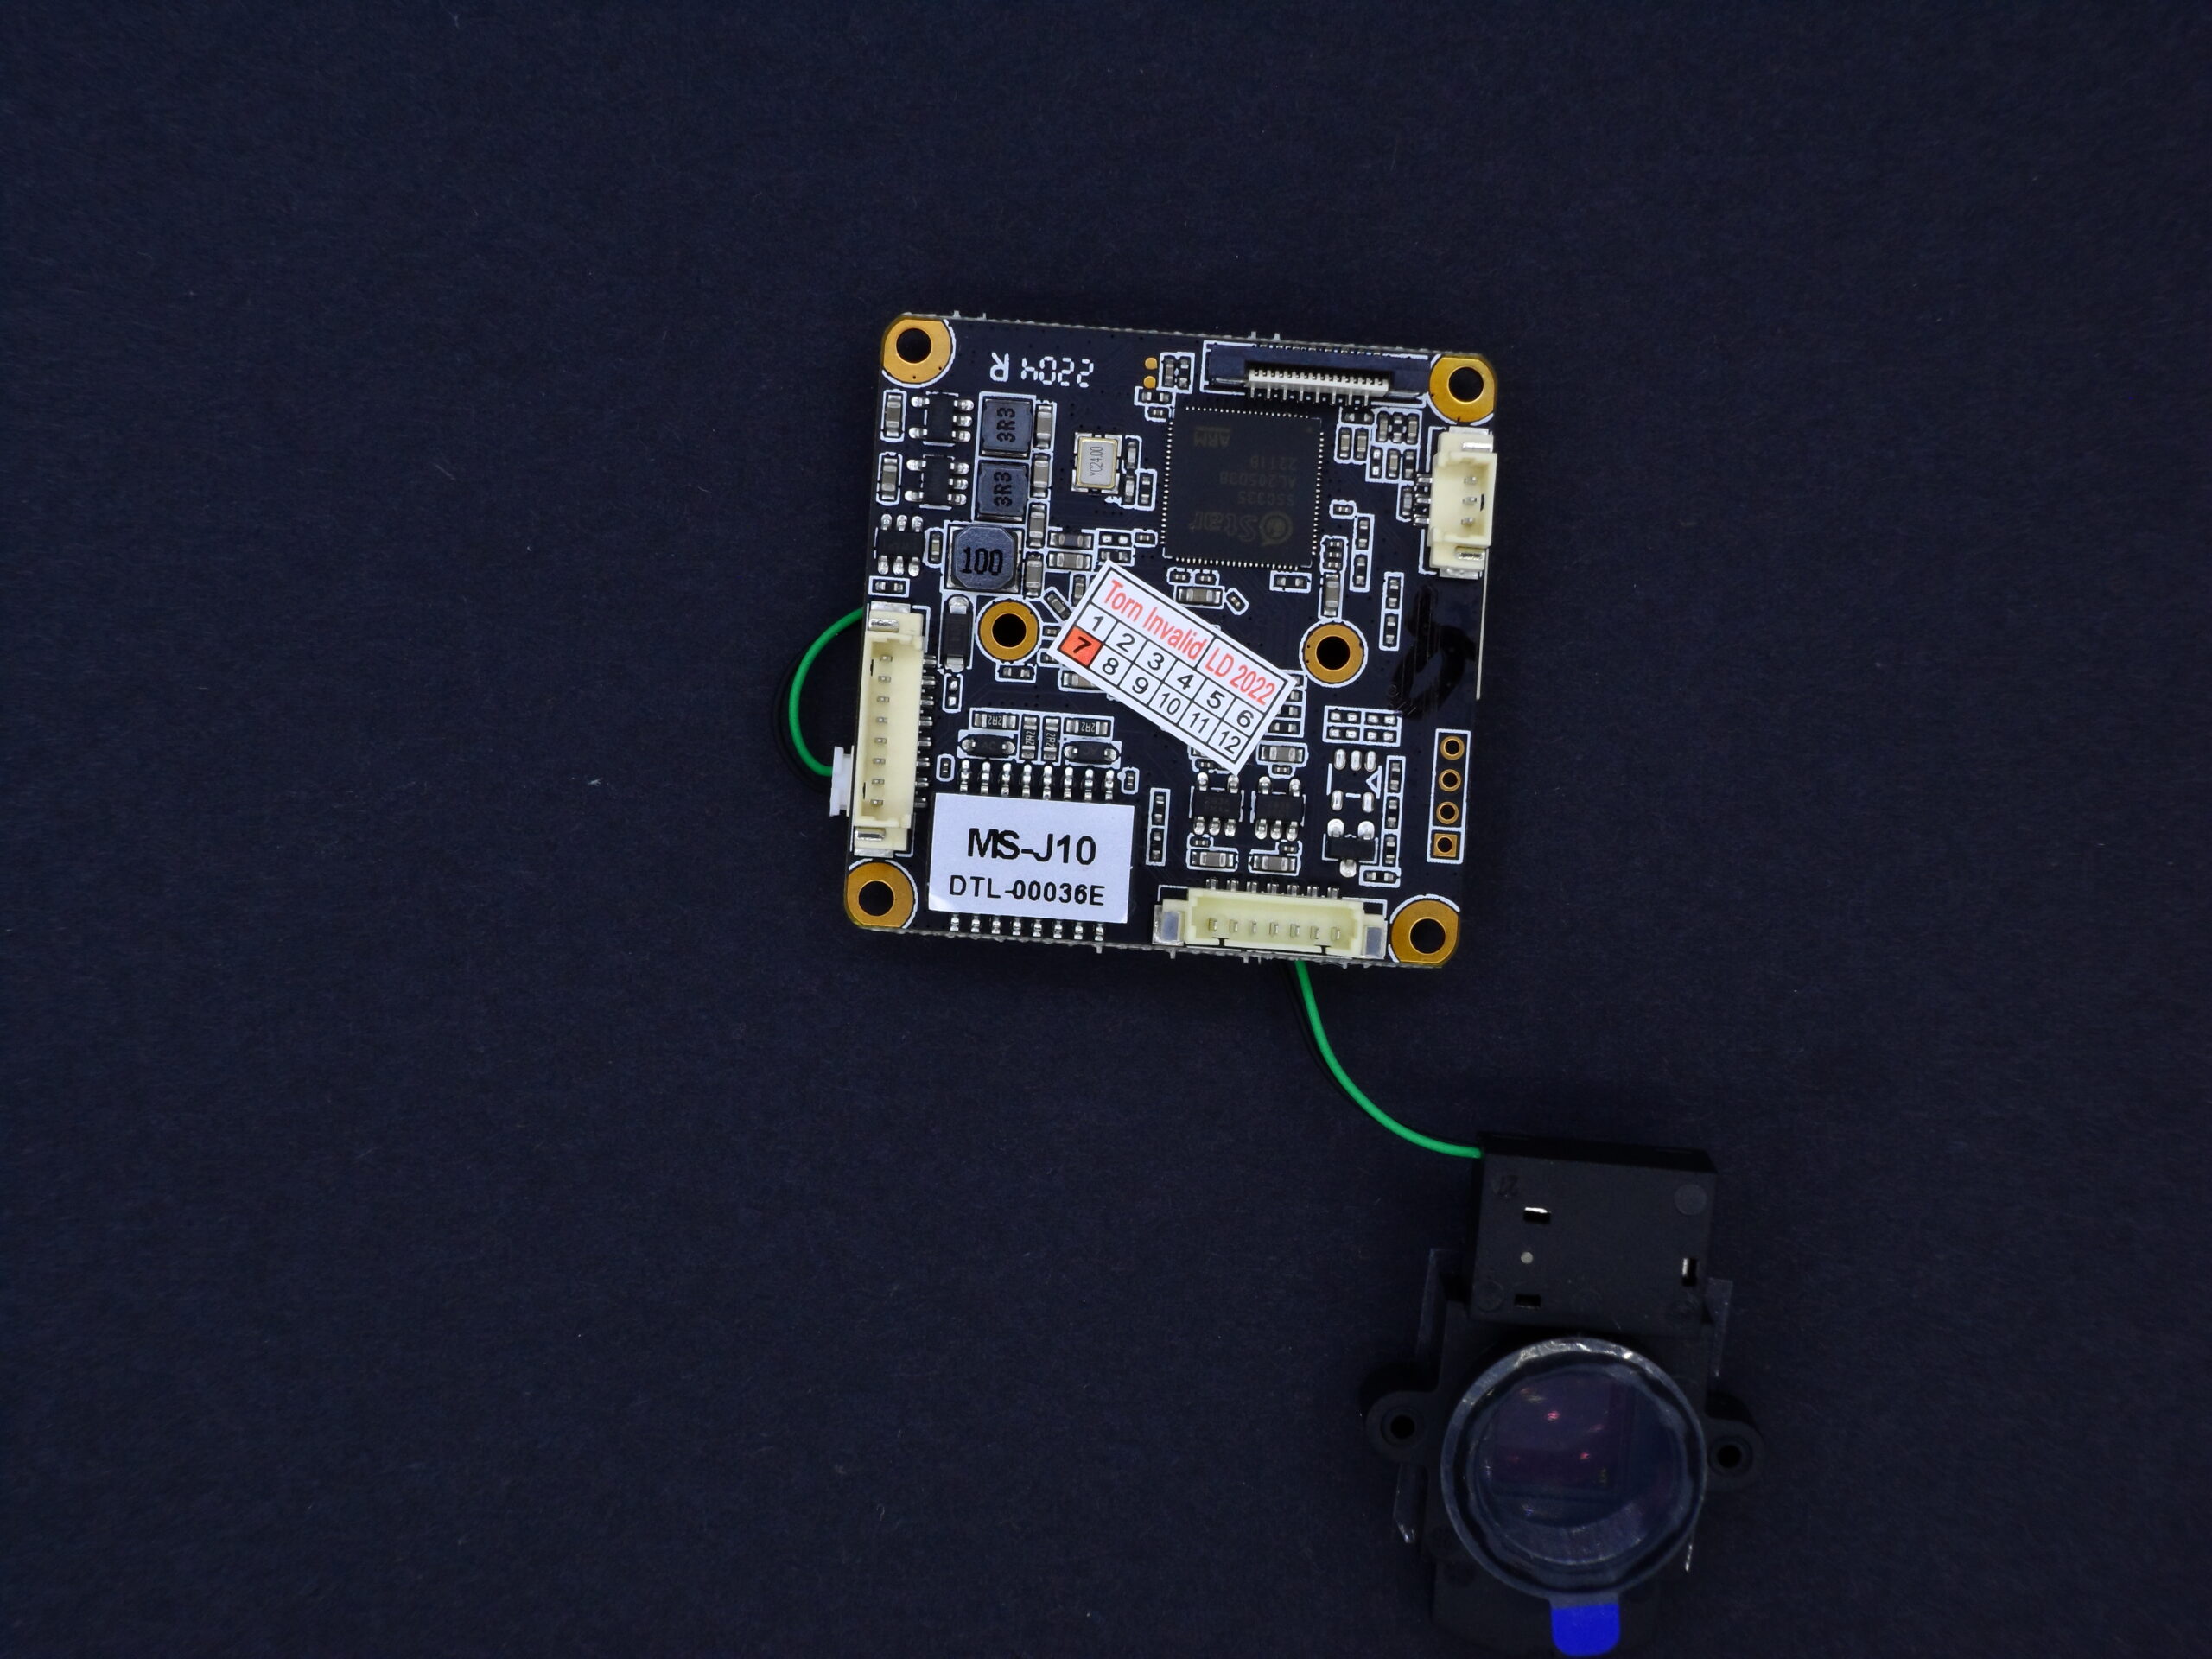
MS-J10 Board
I purchased the MS-J10 Chinese network camera from Aladdin2, a local electronics market. This camera has a resolution of 3 megapixels. It also has a feature called StarLight. This feature displays the image in color at night without a lamp. This means it turns the grass green at night. By “lamp,” I mean the warm LEDs some cameras have. Using them keeps the camera in color mode because they increase ambient light. This is known as Warm Light.
The seller had just received it from China and had not assembled it yet. So I asked him to show me how to put it together. I assembled it myself at home.
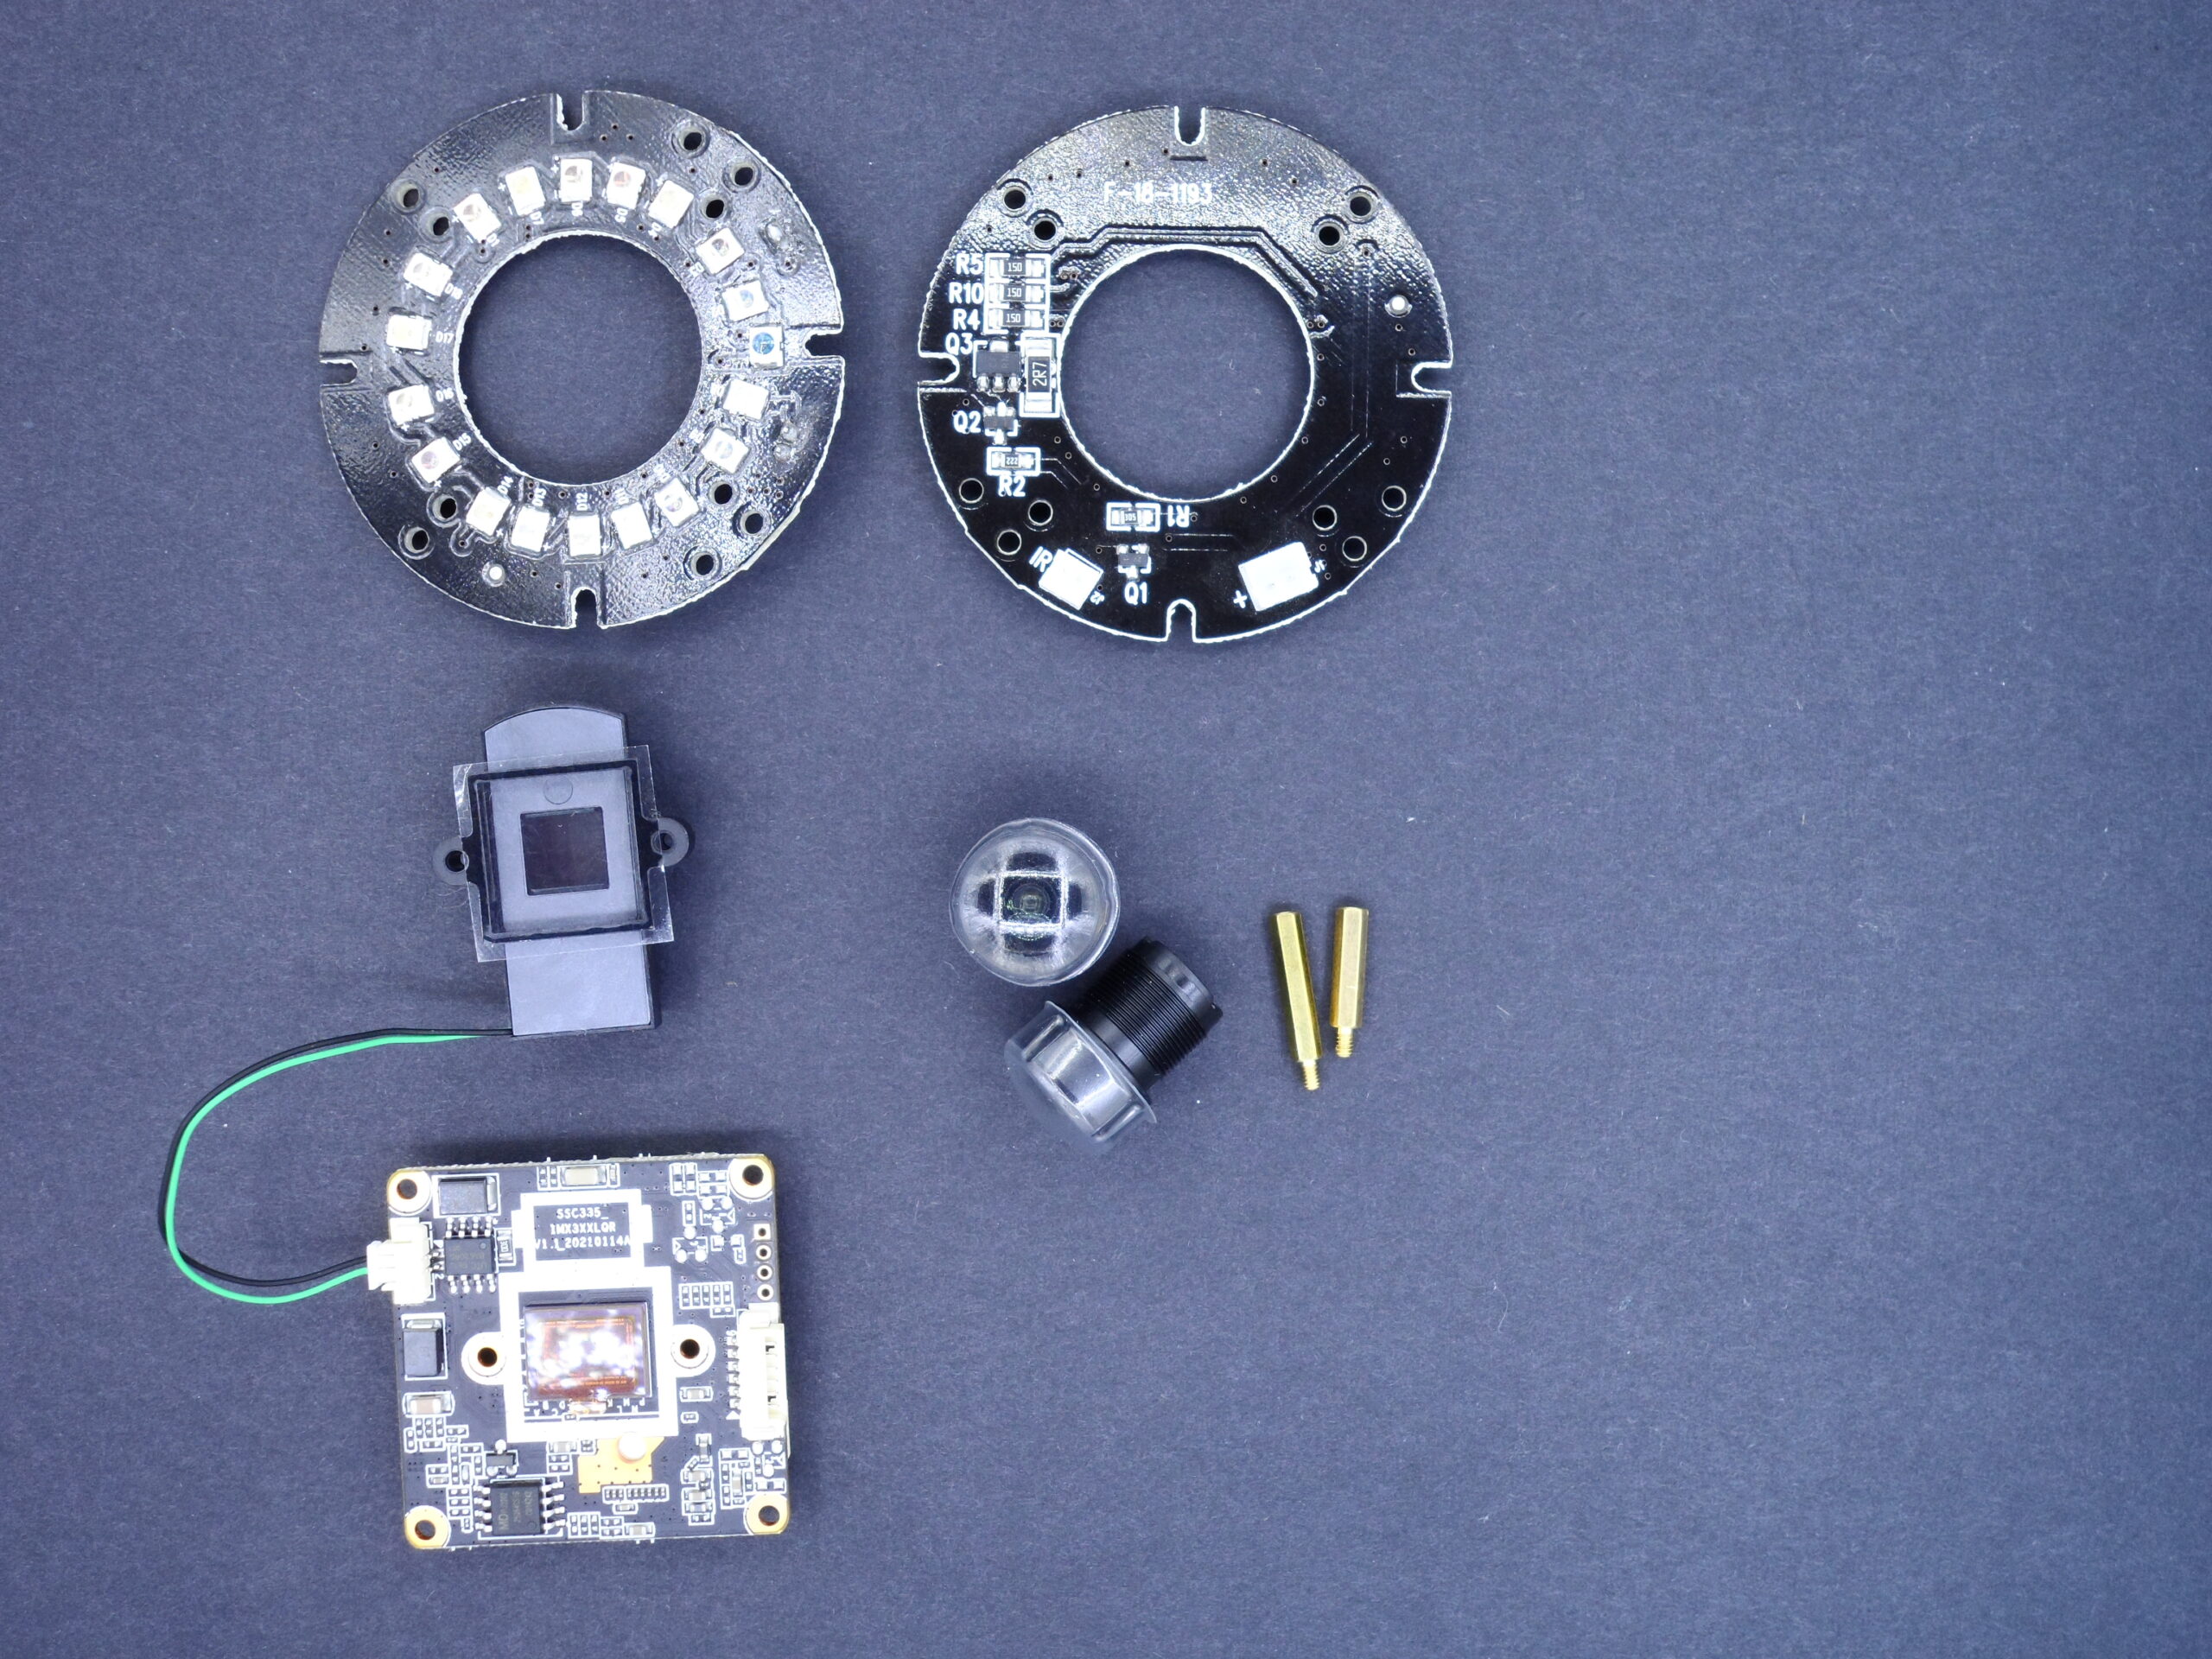
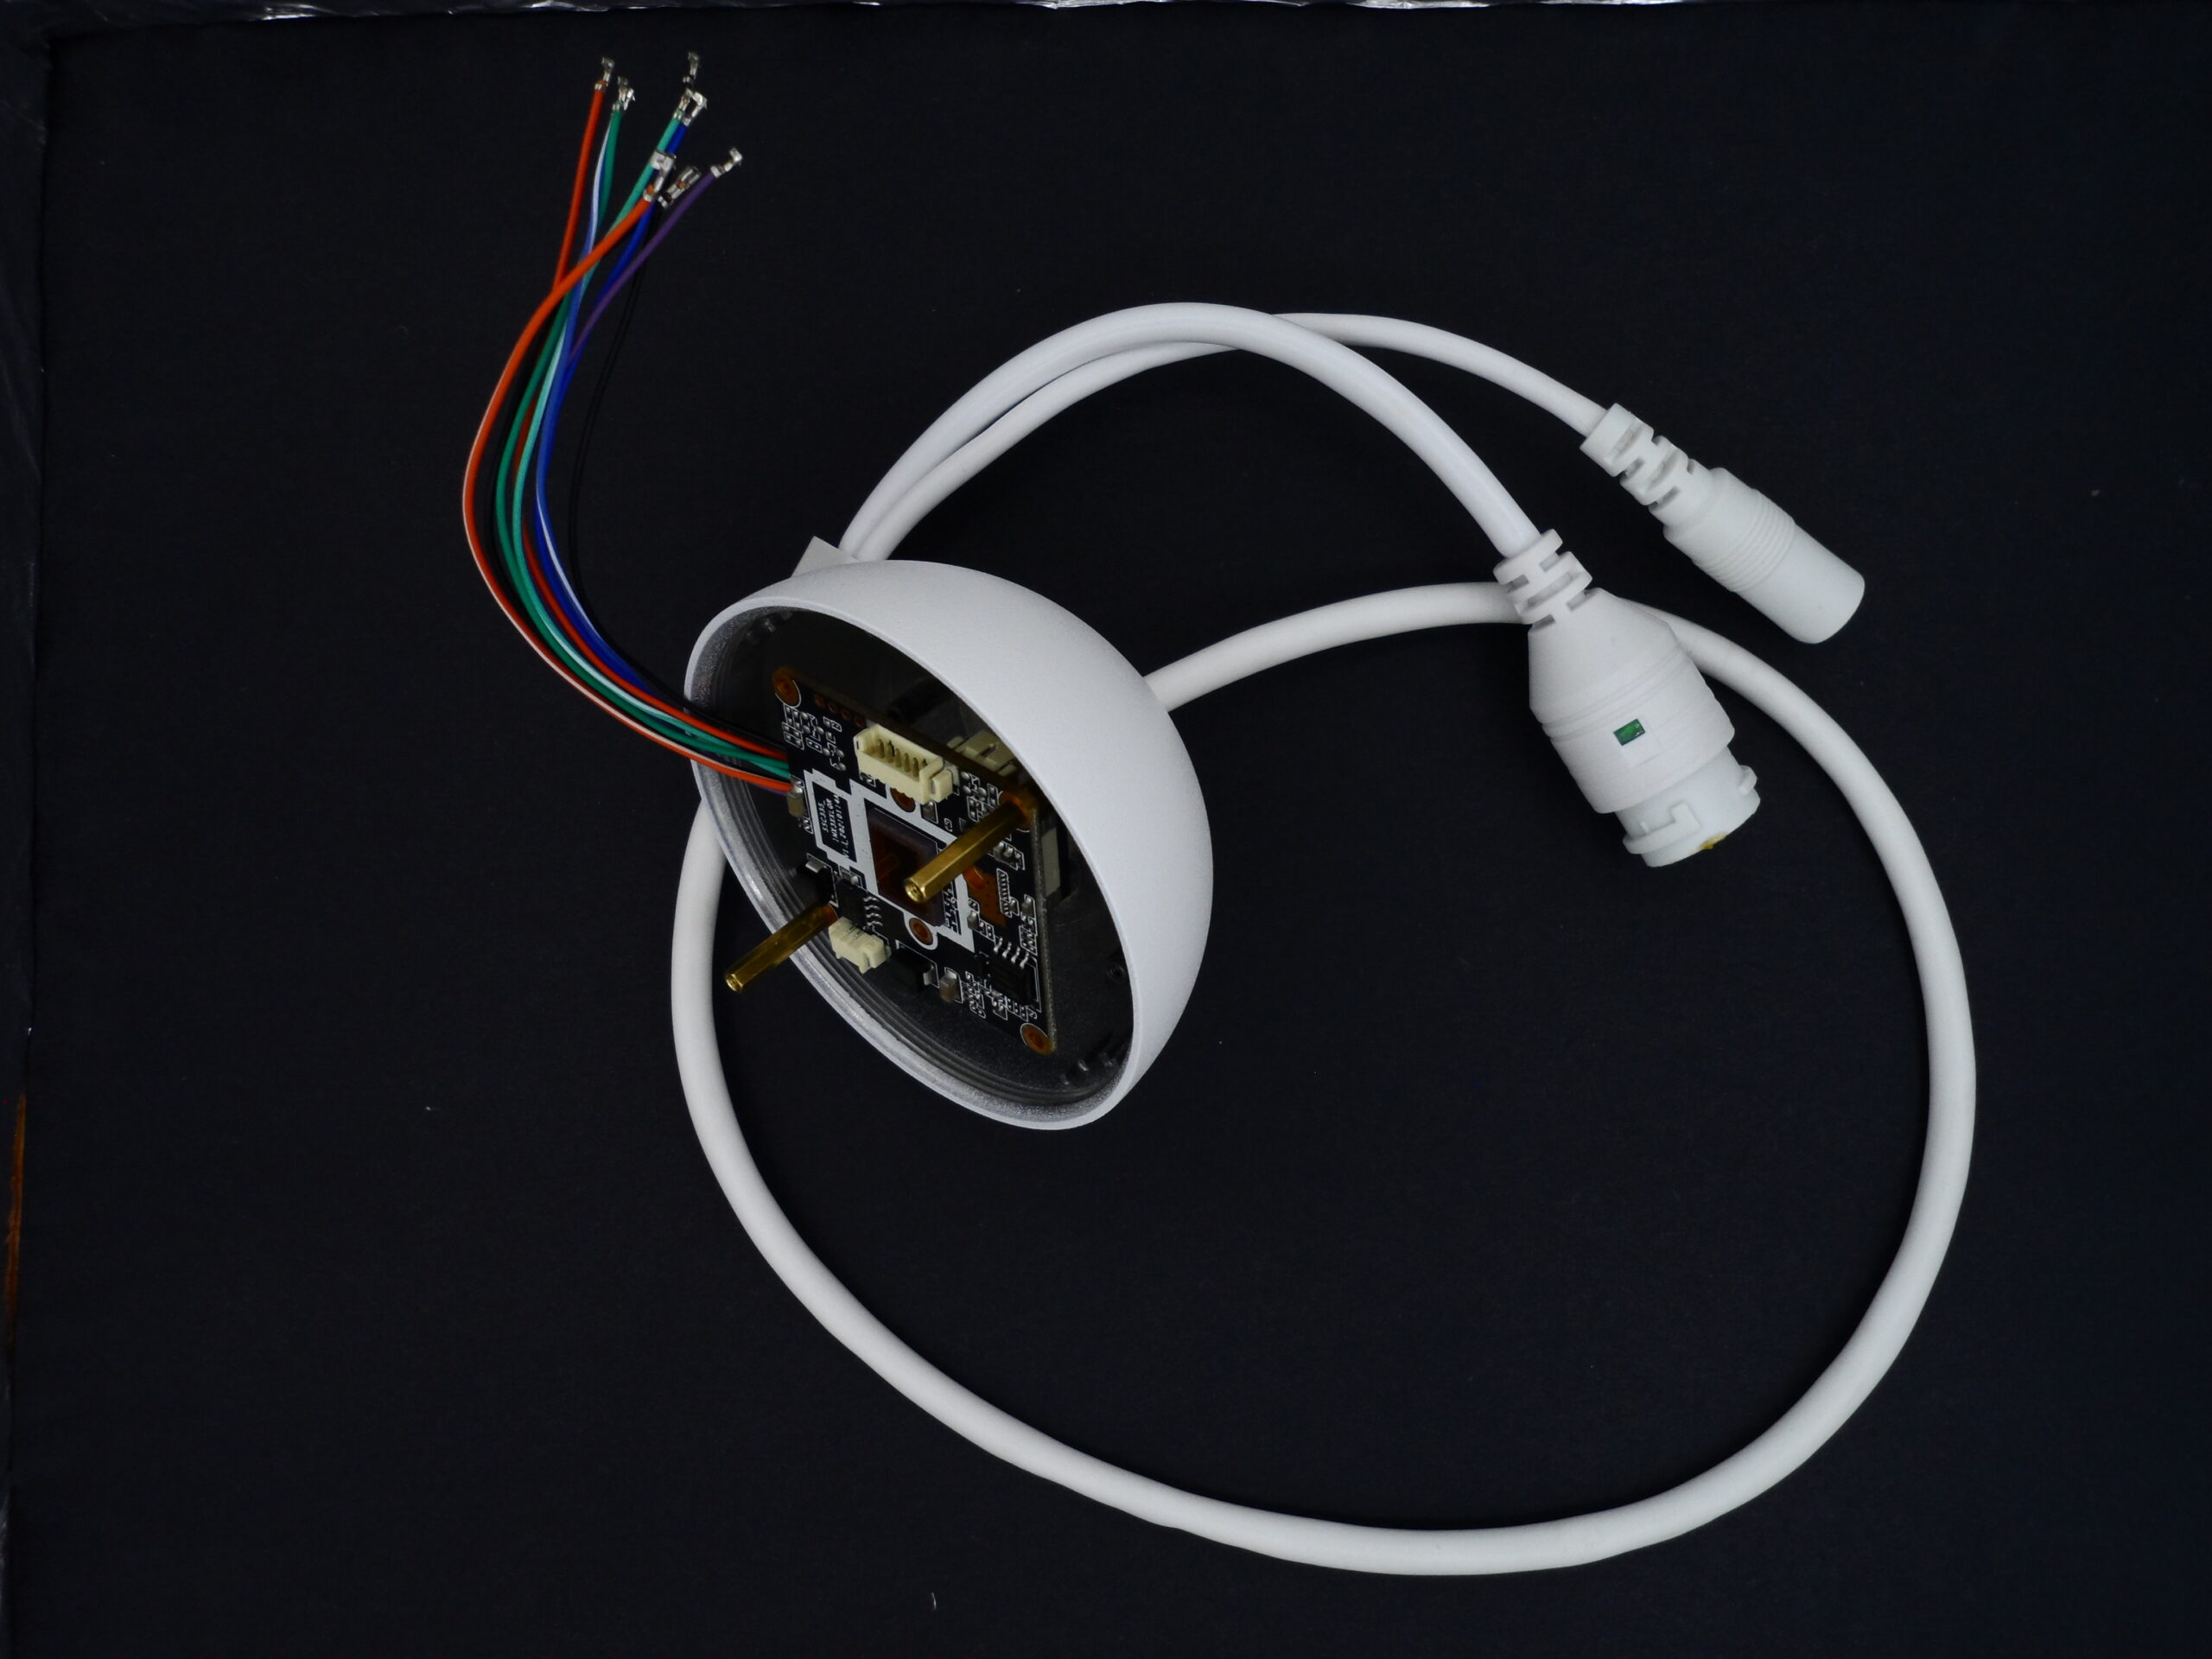
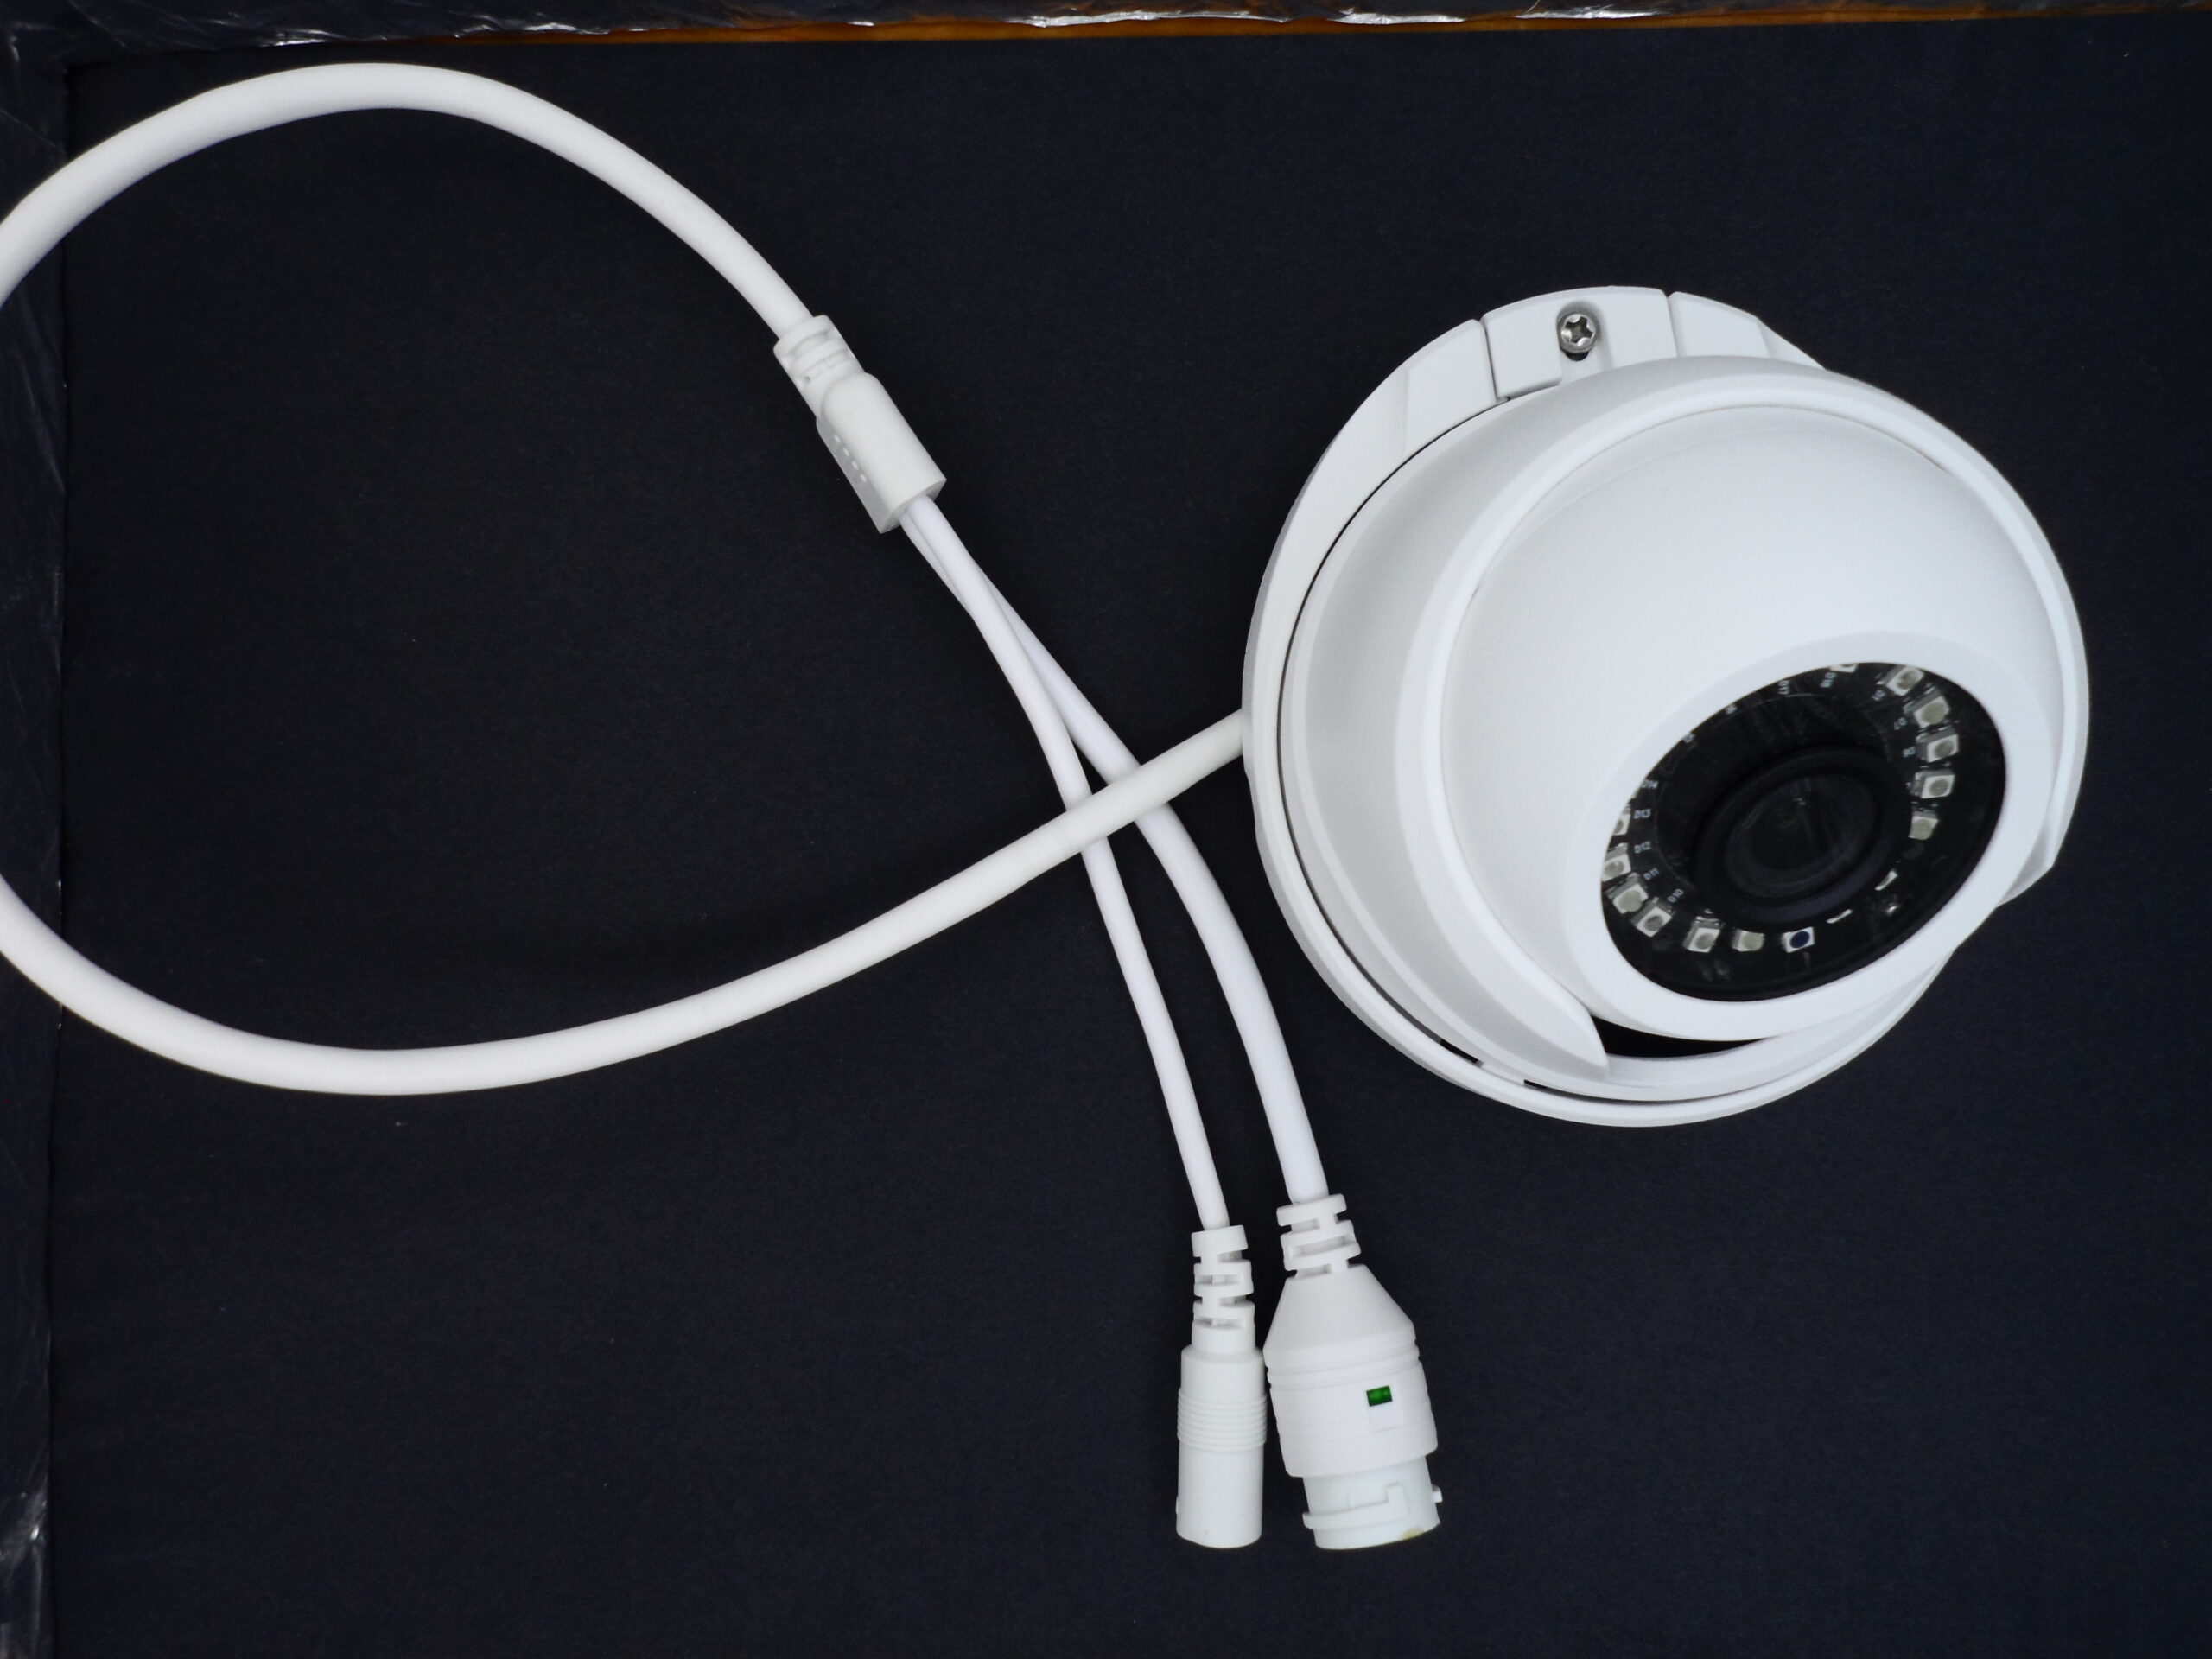
The images below show the parts I received:
- The top board is an IR ring (the Top and back PCBs together). Unlike traditional cameras, the IR lights on this model are never visible to the naked eye. I did not investigate why.
- The IRcut (an infrared cut-off filter that switches to allow or block infrared light), lens, screws, and spacers are in the middle row.
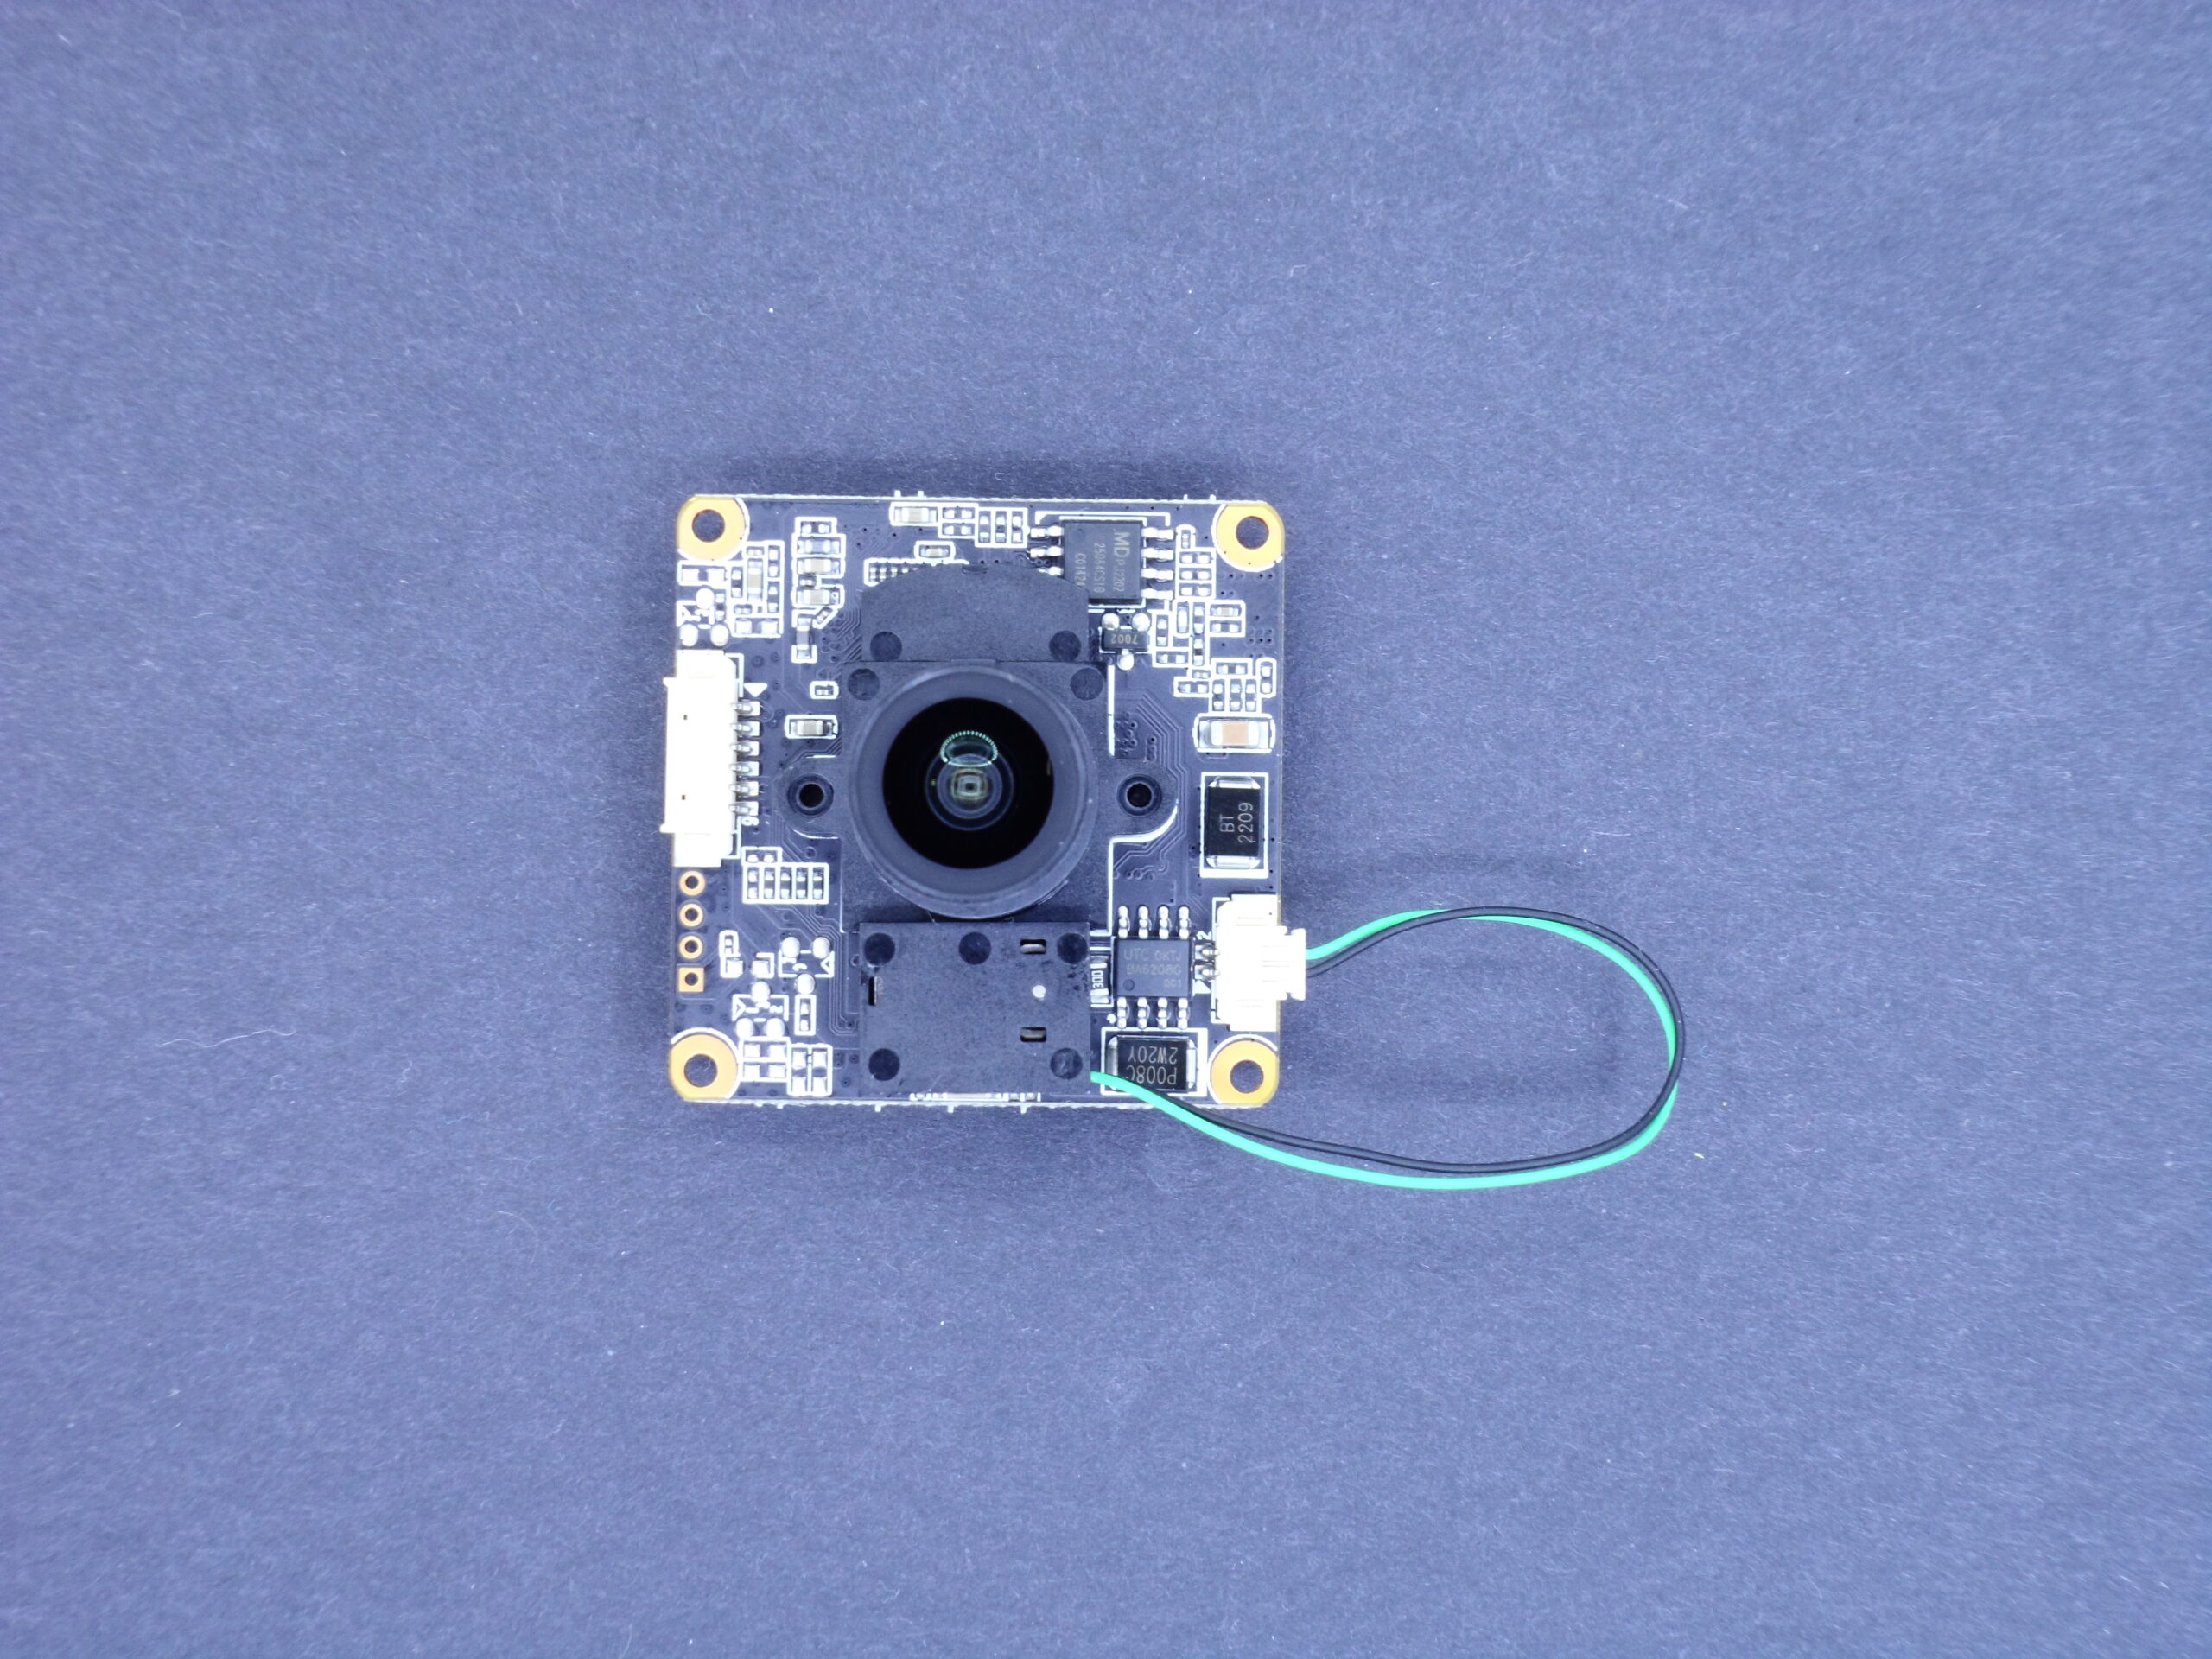
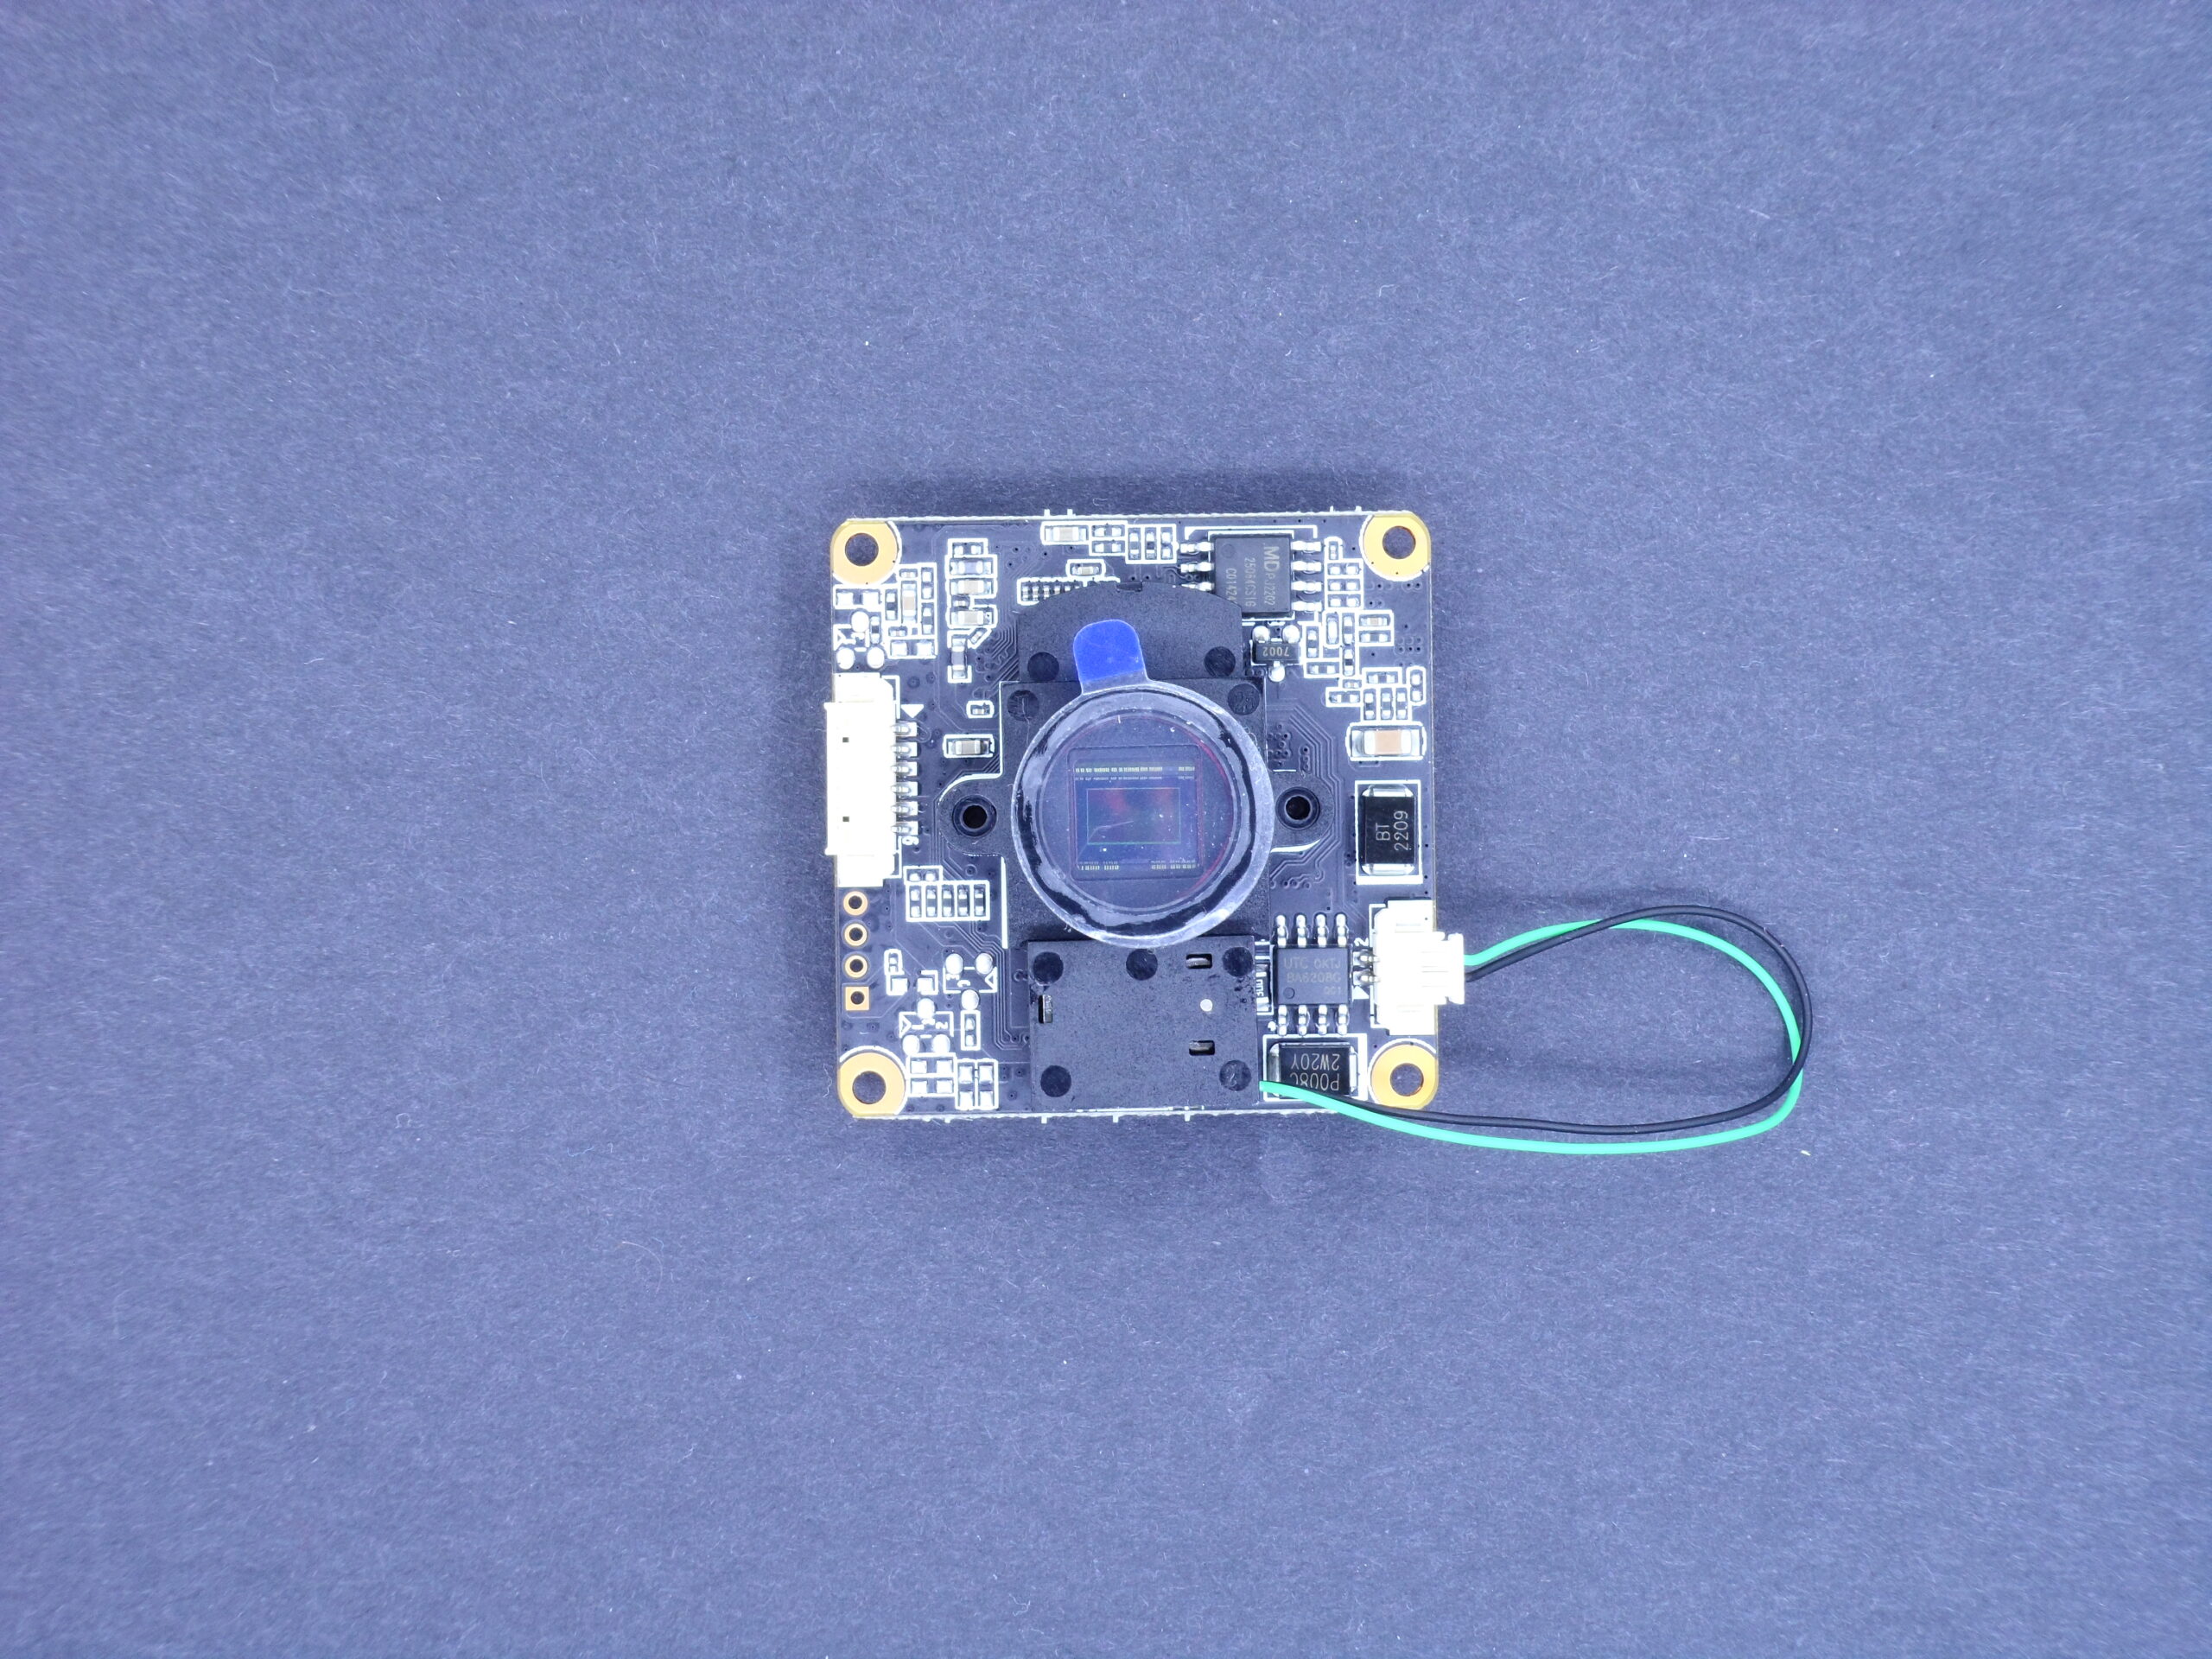
- The bottom board is the main PCB, marked MS-J10 and SSC335. The 335 is a well-known board among sellers. The following image shows an IRcut from the back:
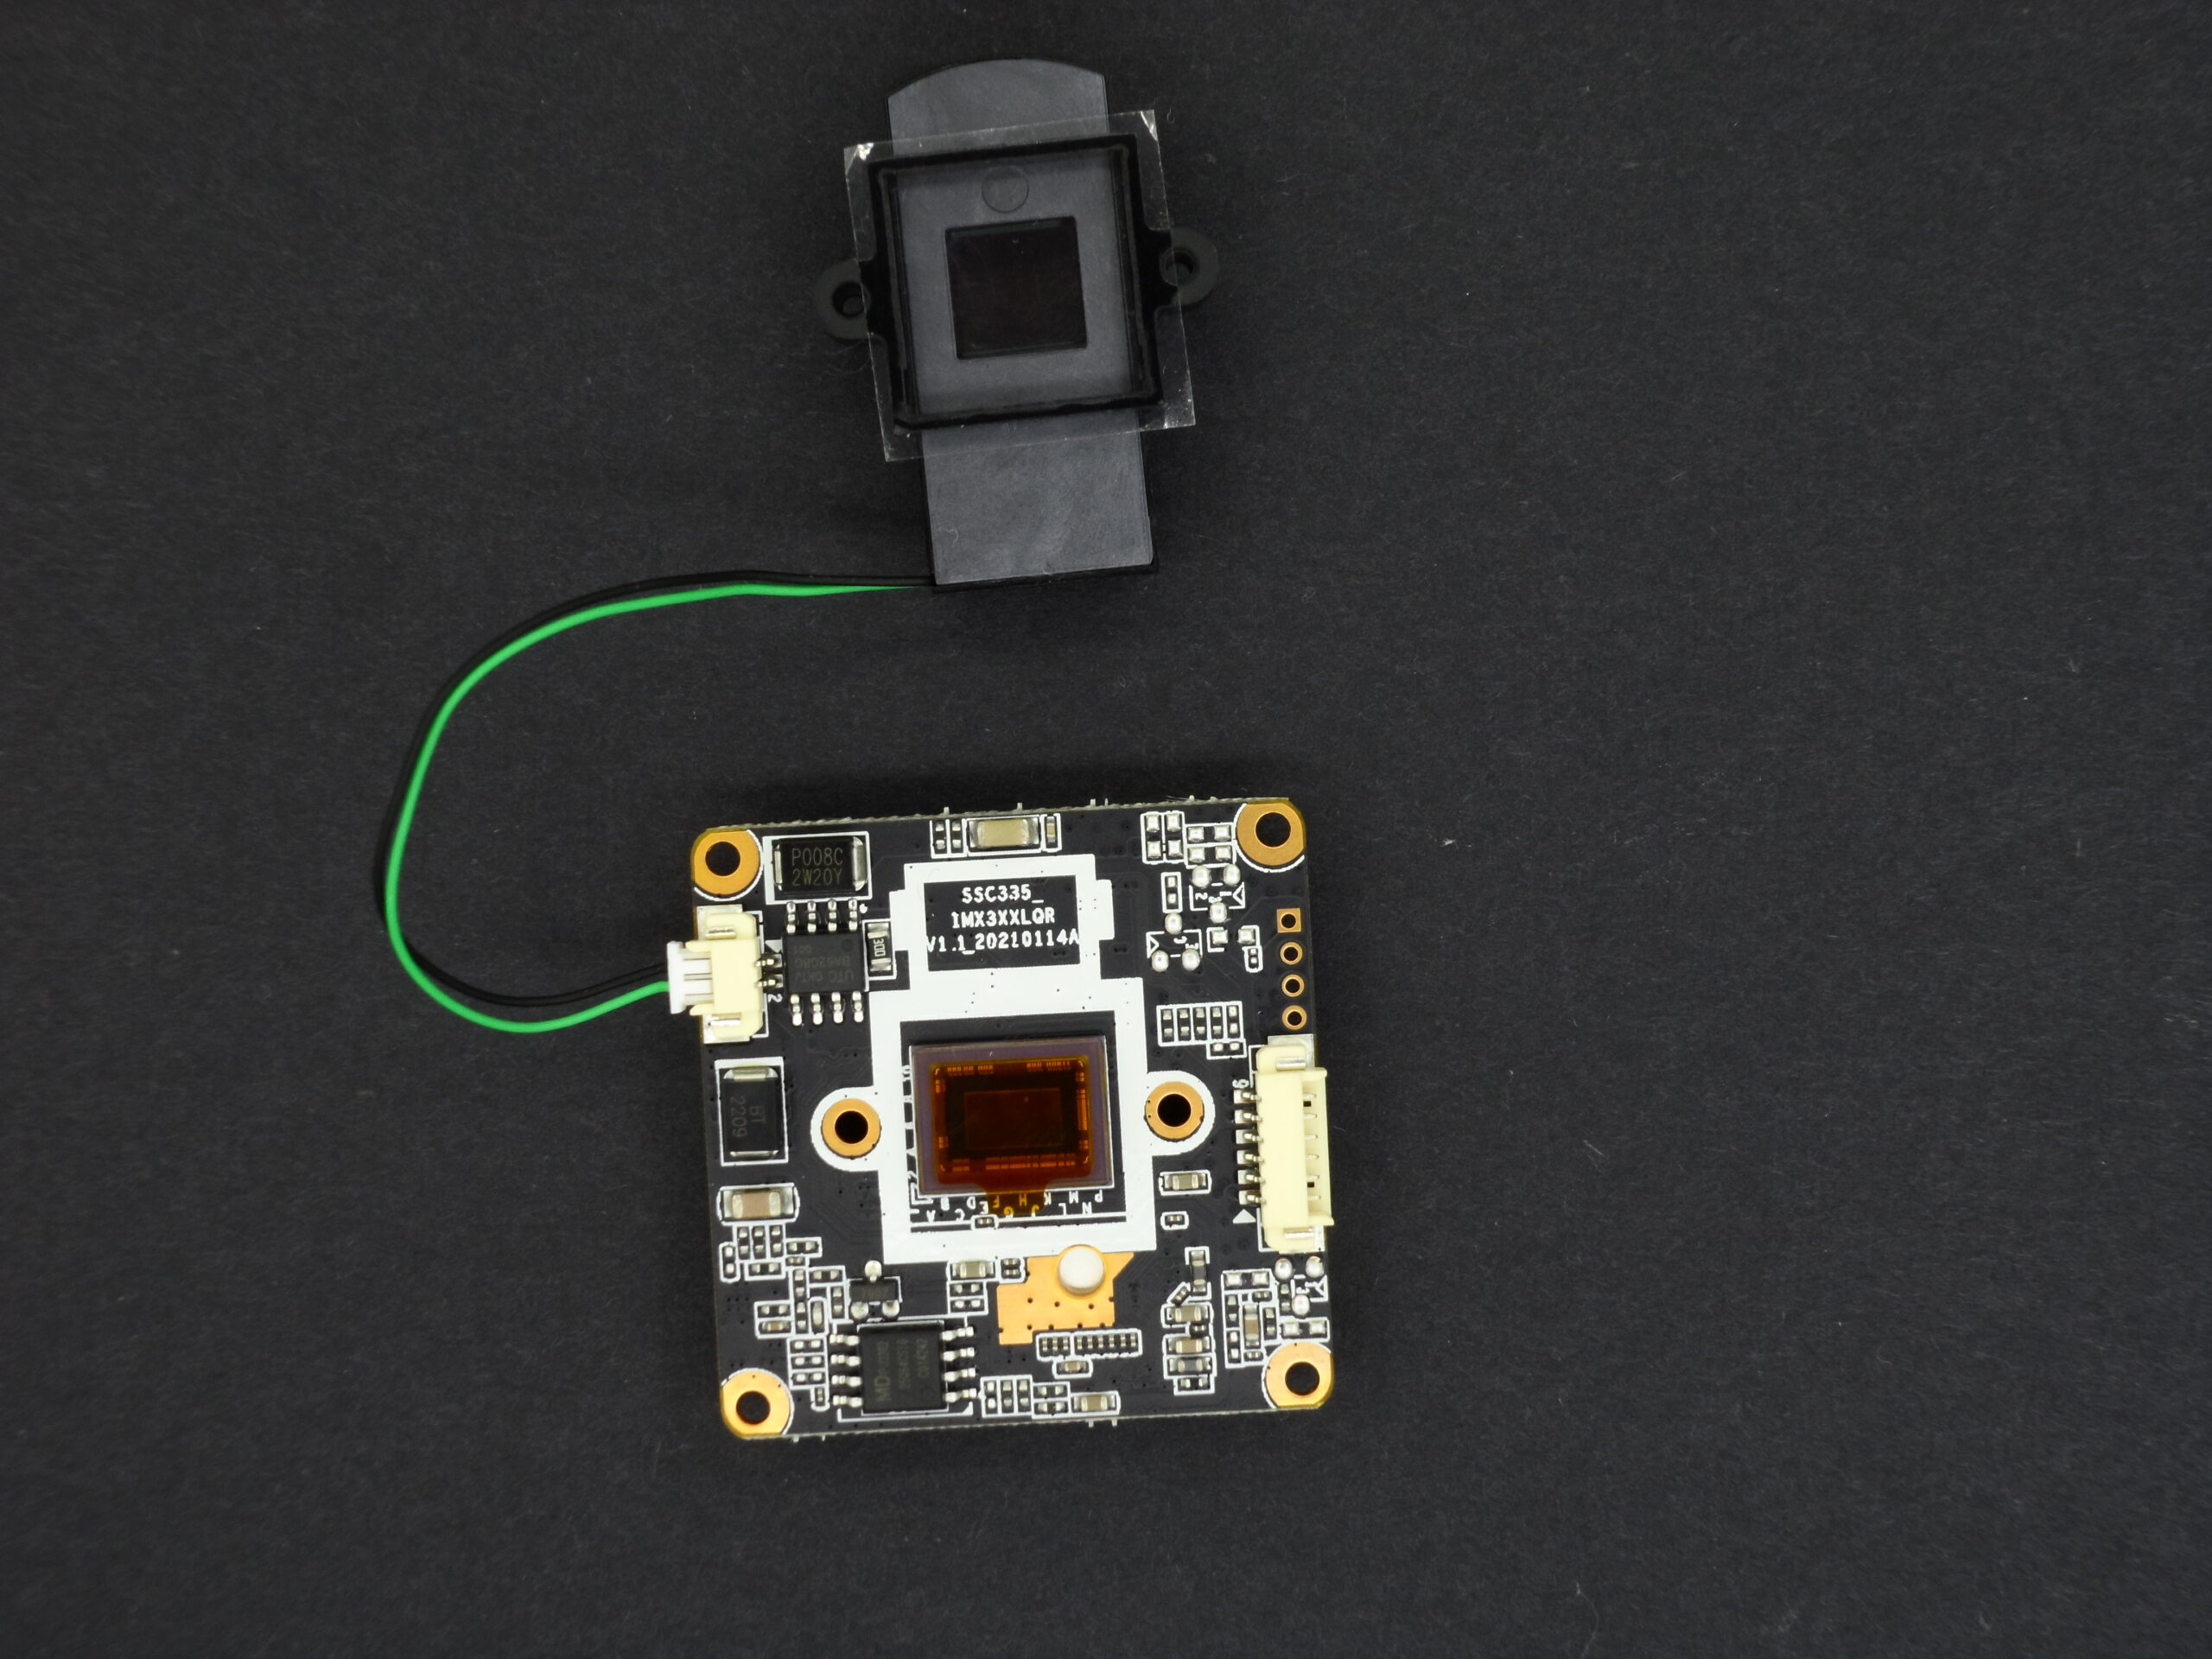
To assemble this camera: (1) Remove the protective film from both the sensor and the IRcut. (2) Immediately fasten the IRcut to the sensor using the tiny screws provided by the seller to prevent dust from settling on the sensor. (3) Next, screw the lens to the board using thread seal tape (Teflon Tape). I’ll explain the reason for this in a moment.

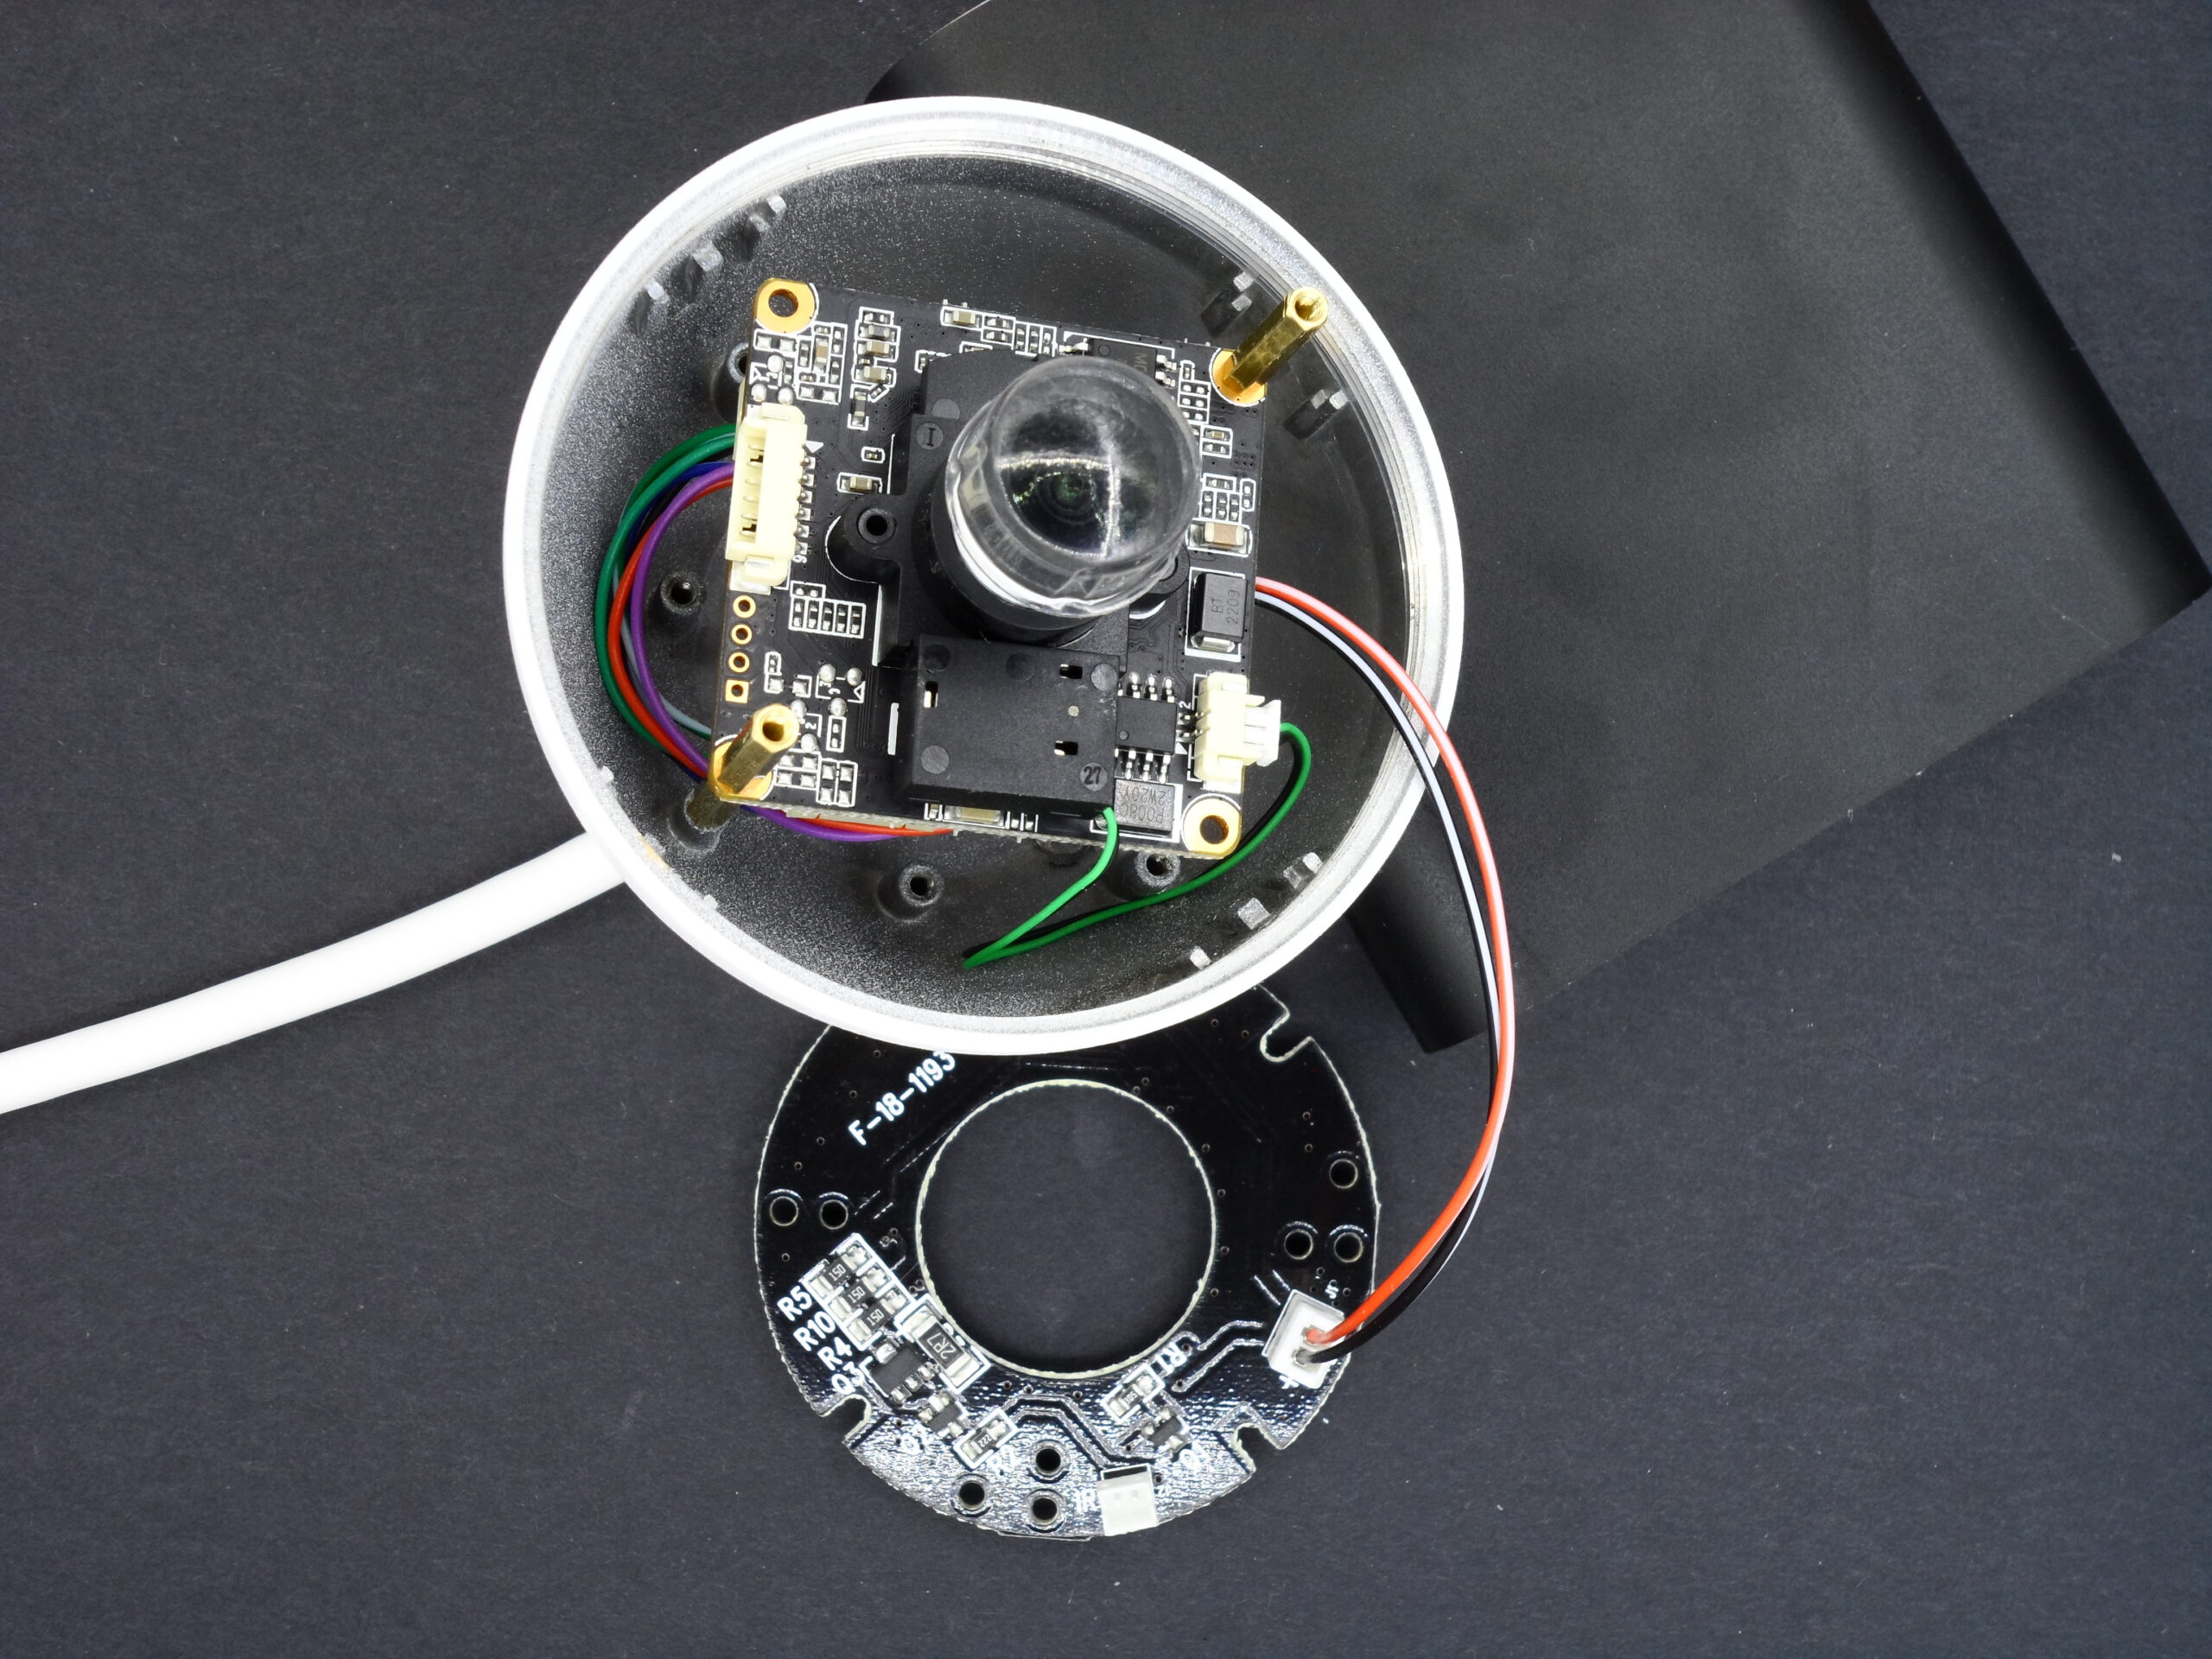
I insert the wire into the frame’s hole after tightening the nut and O-ring. I then inserted the wires into the sockets; the camera’s operation depends heavily on the order of their placement. There is a power line nearby that I connected to the main board and the IR ring light. They will all be secured in the camera frame using screws and spacers. Don’t close the frame all the way just yet, because we need to adjust the lens.


Assemble the camera. Connect it to your router’s Ethernet port and a 12V DC power source. Check your router’s settings to find the camera’s IP address. Enter this IP address in your browser to access the camera’s GUI. Use Internet Explorer, as many Chinese cameras require it and may not work with Chrome or Firefox. After opening the GUI, download the required plugin from the webpage link to change settings.
Log in to the camera using admin as the username and 123456 as the password. The blurry camera image output is displayed on the first page that appears. By moving the lens tighter or looser, you can get a clear image when pointing the camera at a long, open area. Although this procedure isn’t usual, it works. A reference image placed on a wall at a specific distance from the camera is the conventional method for adjusting the camera.

This step requires care; after adjusting the lens, even a slight shake can undo your progress. To prevent this, lock the threads. While the seller suggested using hot glue or super glue to secure the lens, I recommend using thread locker or thread seal tape if available. Once the lens is secure, you can proceed to configure the camera settings.
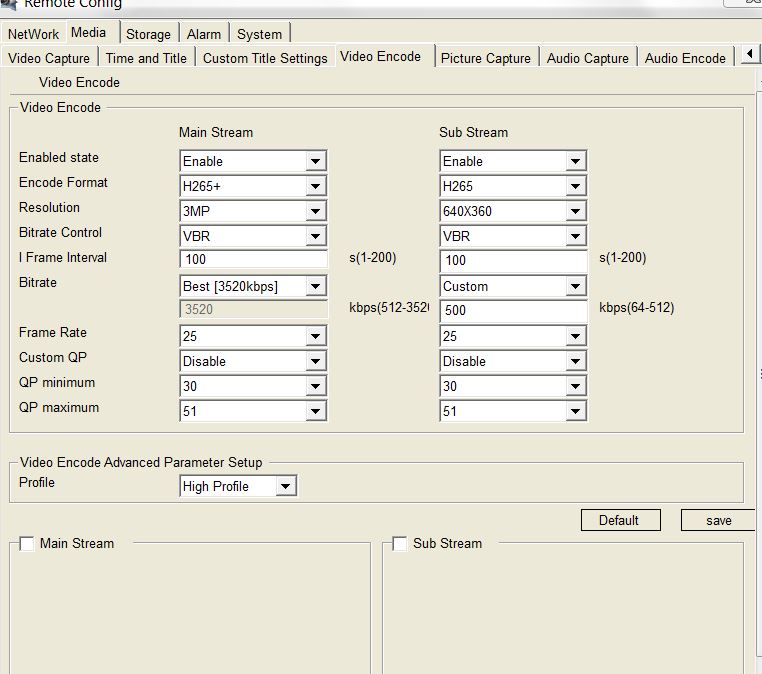
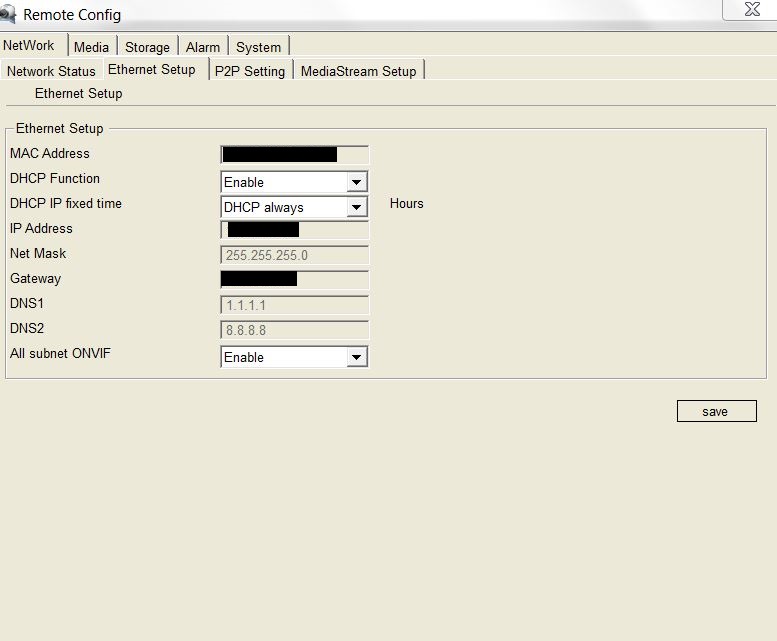
Next, go to the camera’s advanced settings to change DHCP, time, privacy, and other settings. When finished, close the lid to complete the assembly.
Update:
This firmware has a problem with Time. I tried everything: NTP, Manual, and P2P, and it lost time after a few hours. I discovered the firmware below after searching Google and Chinese websites. The old GUI was updated, and the time issue was resolved.
Disclaimer: I will not be held liable for any harm your camera may sustain because this firmware worked for me and my camera.
Download MSJ10_V0_V3.2.0.2_STARC_202209201202
The original link to this model and other models